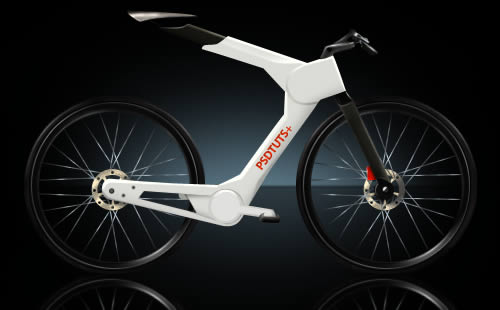
Final Product What You'll Be Creating
Step 1: New File
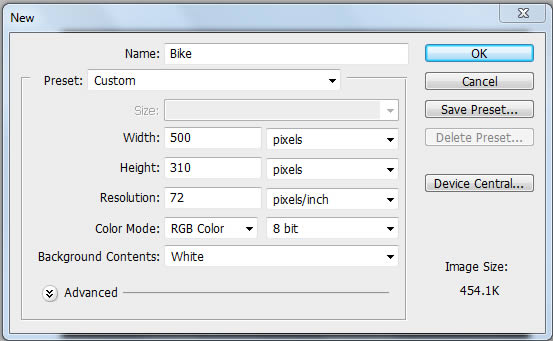
Open Photoshop and set up a new document (Command/Ctrl + N). Use the following settings;Resolution: 72dpi, Color Mode RGB color, Dimensions: 500×310 px.
Step 2: Creating the background
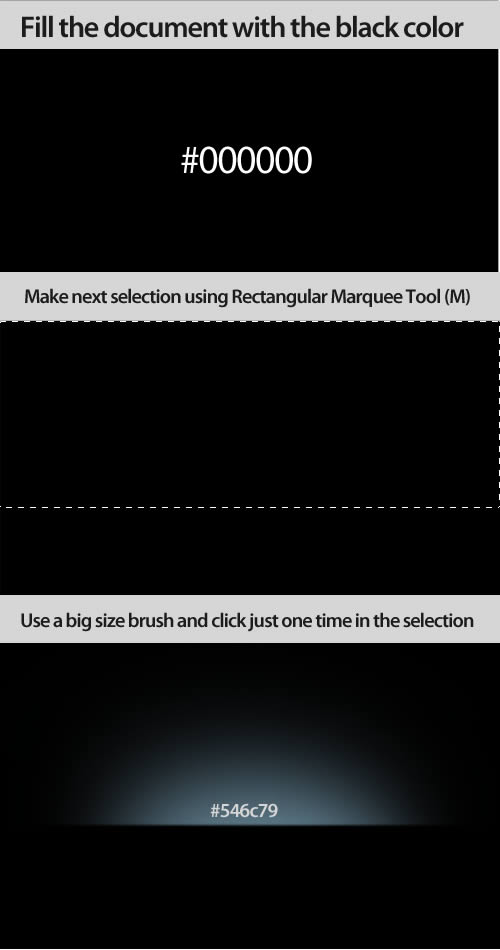
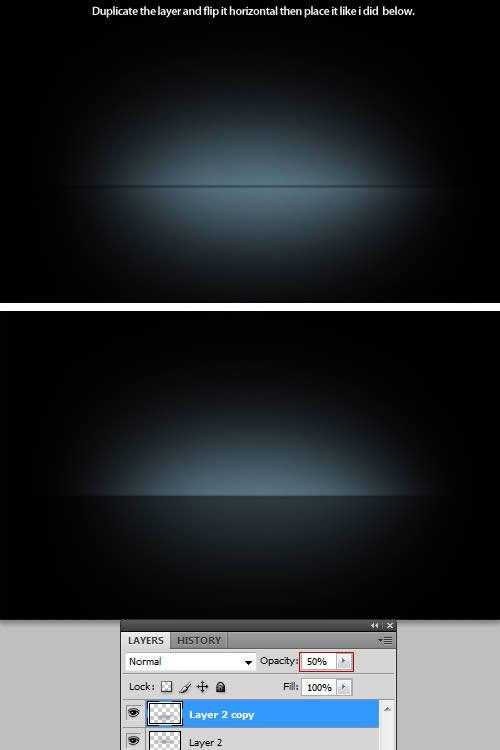
Fill the document with the black color #000000, then make a selection using Rectangular Marquee Tool (M) like I did. Into a new layer (Command/Ctrl + Shift + N) using Brush Tool (B) with a big master diameter brush one time inside the selection.Color Code: #546c79
Step 3: Start creating the bike
Using Pen Tool (P) create the Bike shape, fill it using a grey color (color code: #dbdcd6). After that, we are going to give a 3D look using selection tools and light/shadows tools.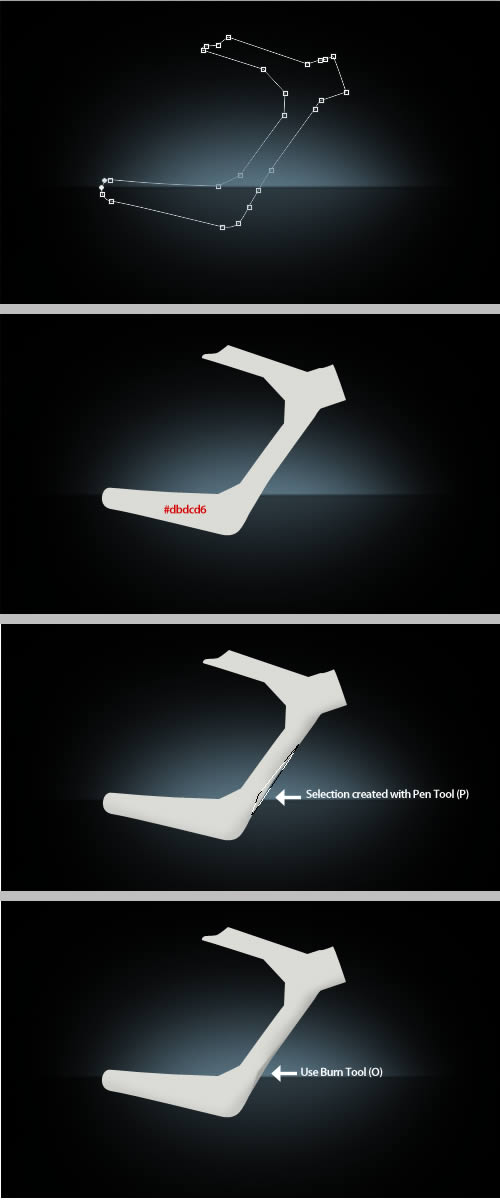
Step 4: Working on details: Lights/Shadows
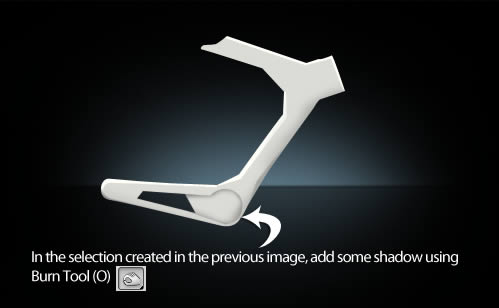
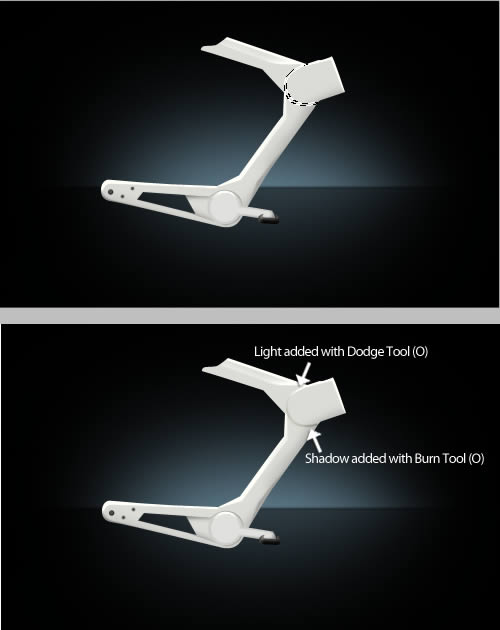
Continue to add lights and shadows by selecting different parts and use Burn Tool (O) to add shadows and Dodge Tool (O) to add light. In this step we are going to add just light.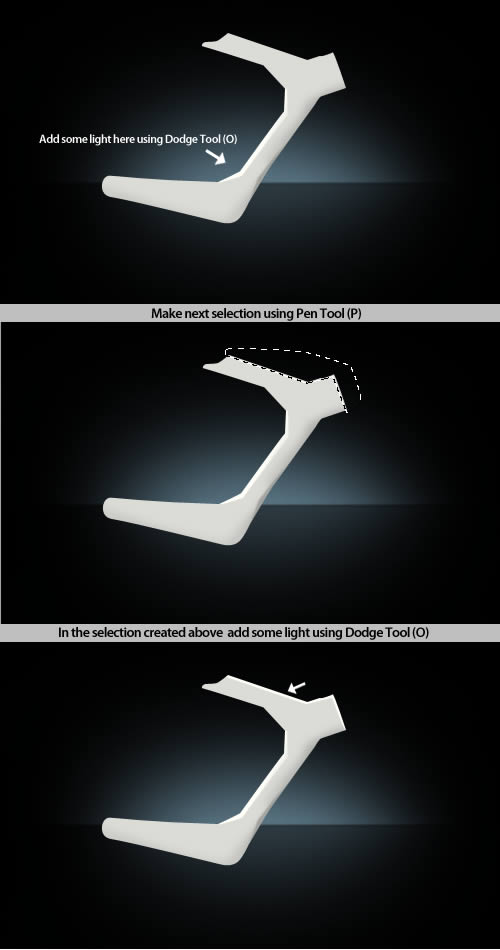
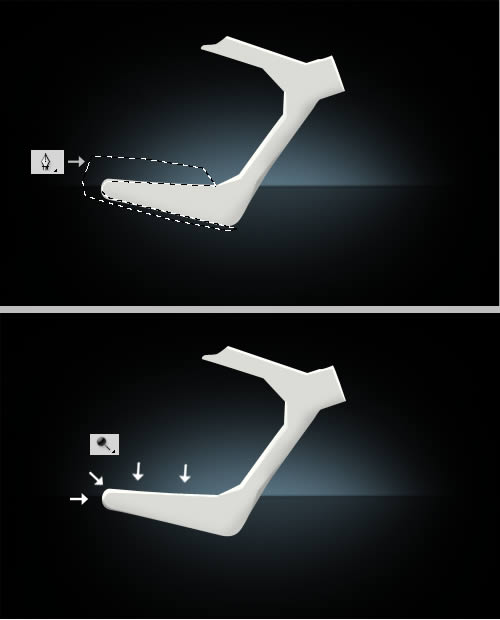
Step 5: Creating Bike Elements
Delete the indicated part by selecting it and pressing "Delete" key then create a new selection using Pen Tool (P) and a Feather Radius ~ 0.3 pixels for better results.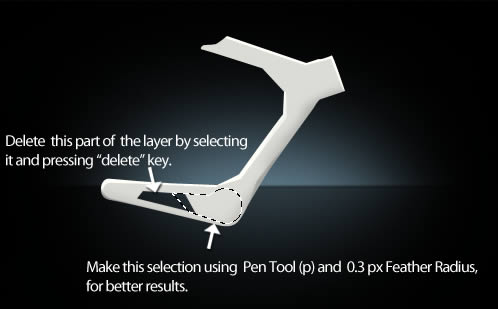
Step 6: Pedals
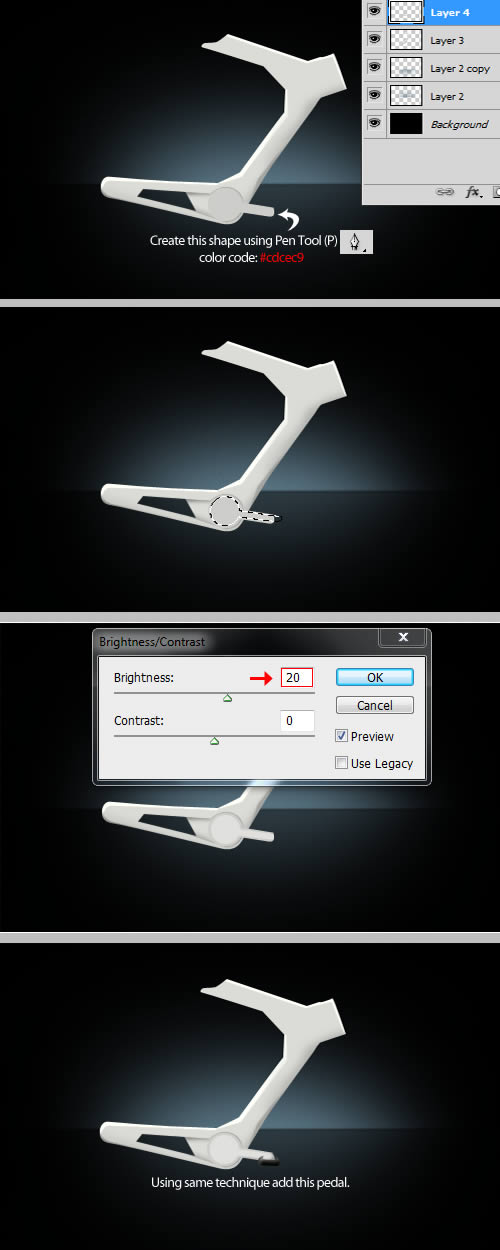
In this step we are going to create the pedal shape, so create this shape using Pen Tool (P) color code: #cdcec9. Select a part of it using Pen Tool (P) and go to Brightness/Contrast, here make the settings from the image below.Use same techniques to create the pedal.
Step 7: Small Details
Now add some small details like reflections and some other things.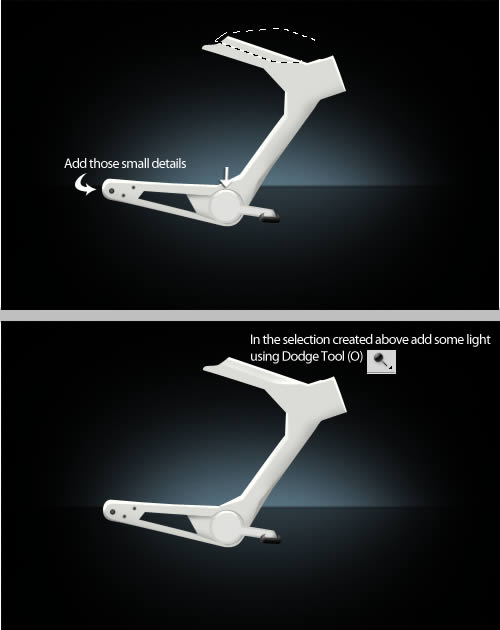
Step 8:
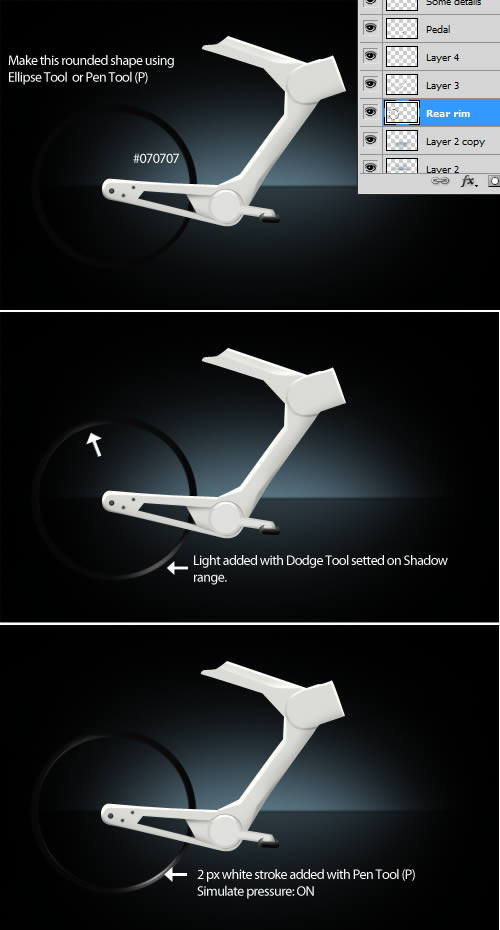
Rear Wheel
Now, we are going to create the wheels! First of all make a rounded
shape using Ellipse Tool or Pen Tool (P) and delete the middle of it!
Use Dodge & Burn Tool (O) to give the 3 look! After that start
playing with stroke lines to add Light & Shadows
Step 9: Light over the rim
Select this part of the rear rim using Elliptical Marquee Tool (M) then, in the selection created add some light using Dodge Tool (O)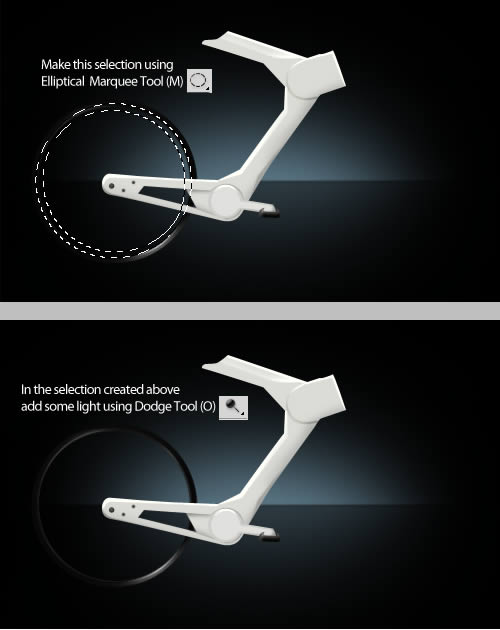
Step 10: Creating the rear tire
Start by creating another rounded shape around the Rim using a dark grey color. I used #121011. Again, start playing with light/shadow/stroke like I did in the next images to obtain 3d & real effect.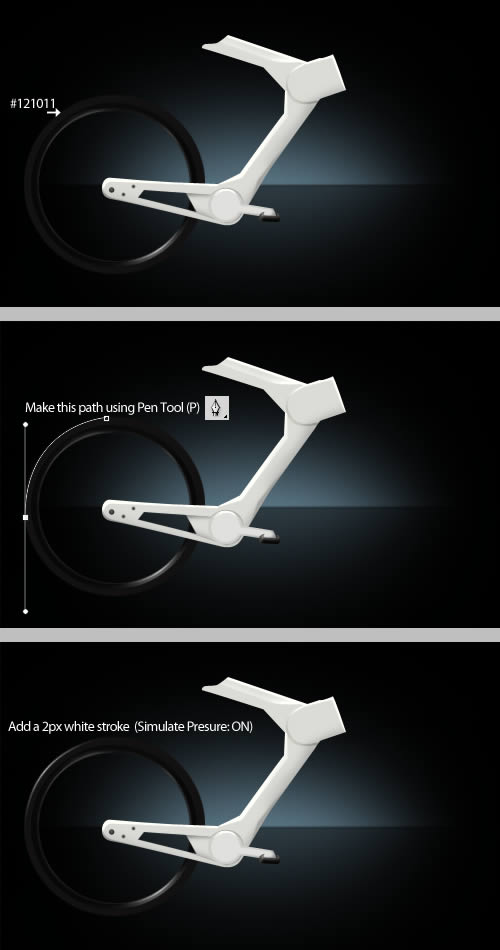
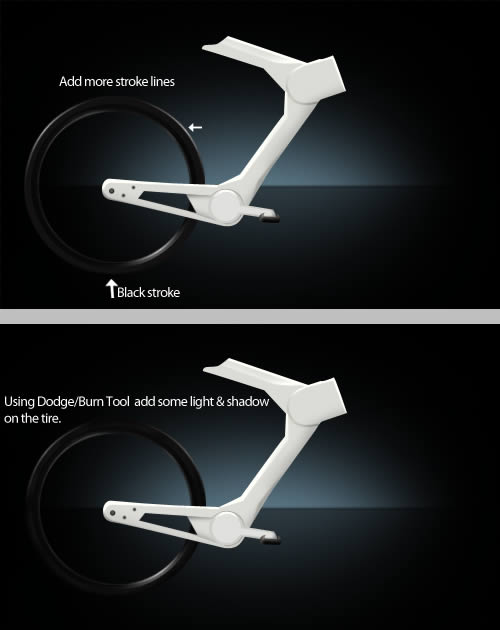
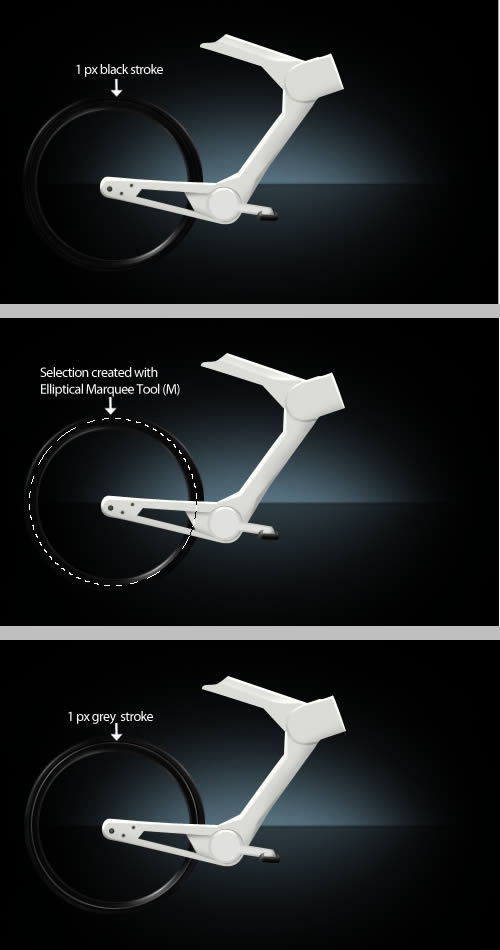
Step 11: Spokes
How we can creating the spokes? Really simple. Use Pen Tool and start creating 1 pixel gray lines like I did in the next image, then using Burn/Dodge Tool (O) add some shadow and light over the spokes to obtain a real effect. After you are done with the spokes from the top part of the wheel, duplicate the spoke layer, flip it horizontal and place it like I did down.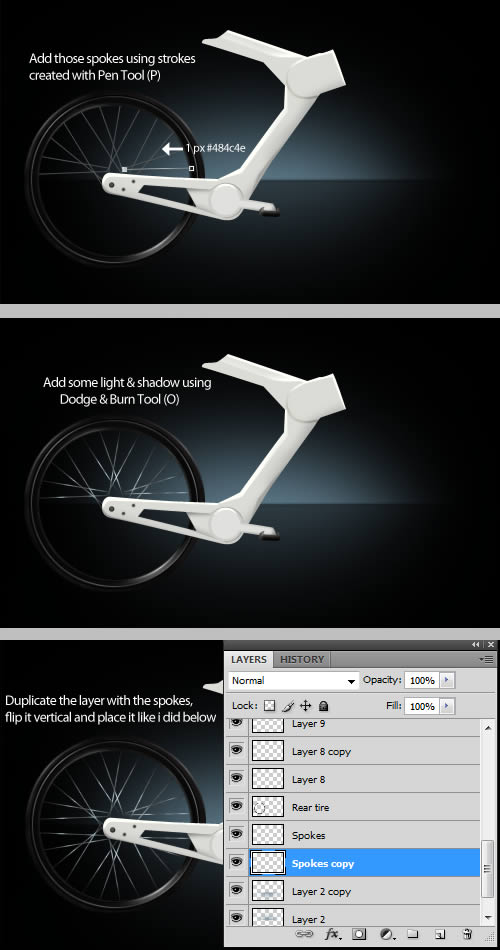
Step 12: Disk Brake
For creating the disk brake we are going to use the Ellipse tool and a light brown color (#9c9075). After you created an ellipse, delete the middle part using a selection tool and pressing "Delete" key.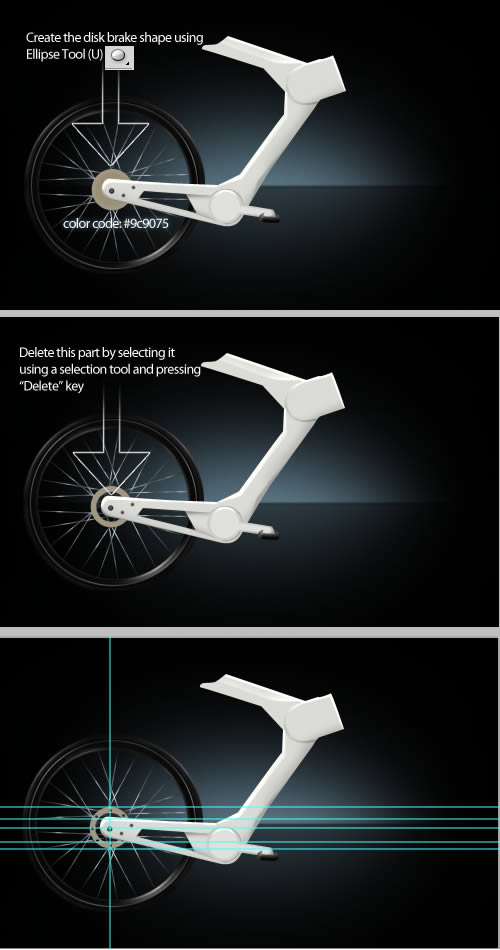
Step 13: Effects on the disk brake
Go to Filter > Noise > Add noise and make the settings from the image below! For giving to our disk brake a real effect we need to use some light & shadow so, by watching the pictures down add some highlights and shdows over the disk using Dodge/Burn Tool (O).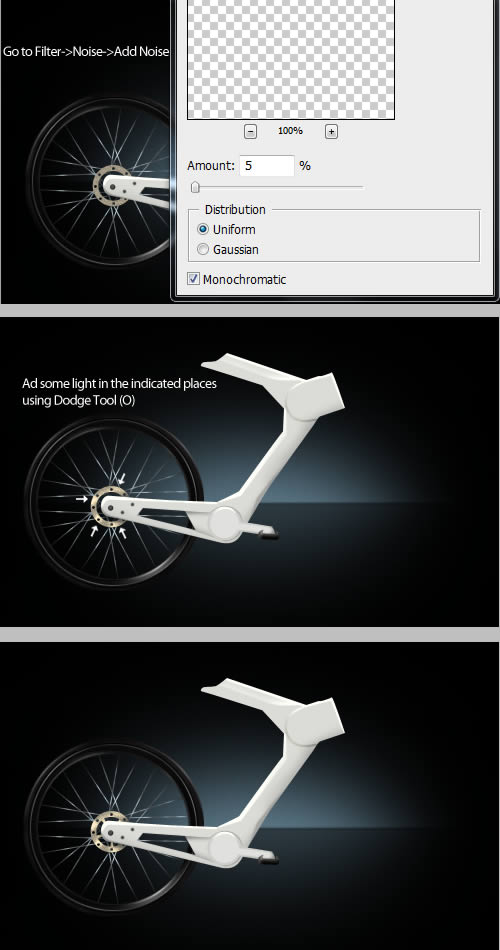
Step 14: Seat support
Make a shape using Pen Tool (P) and a dark brown color (#161510) then go to Filter > Noise > Add noise and use a amount of 0.5% for a better effect. Again, add some shadow & light over our seat support.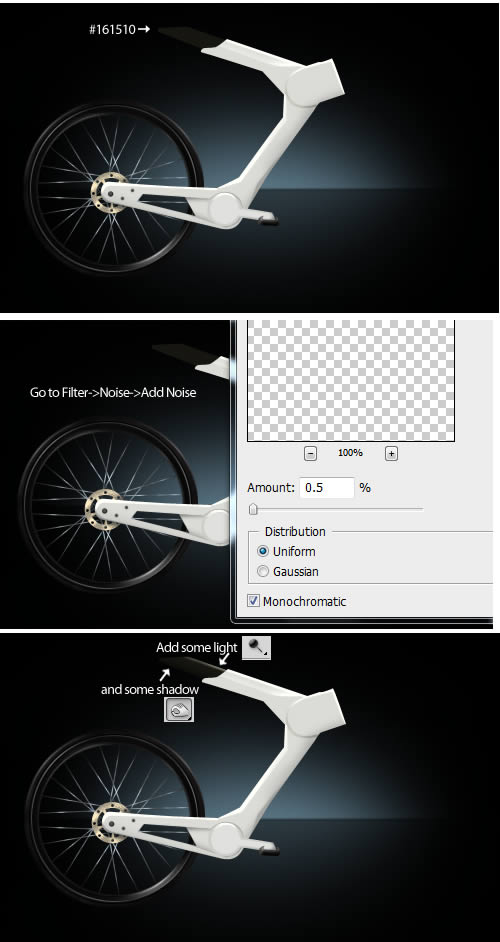
Step 15: Seat
Create the seat shape using Pen Tool (P) and a dark (almost black) color, I used #010103! Then, over the shape created, add some light in the top part using Dodge Tool (O).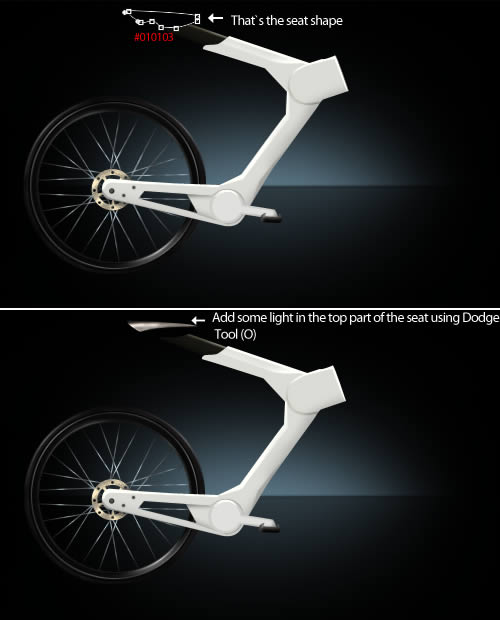
Step 16
Add more details on the seat support.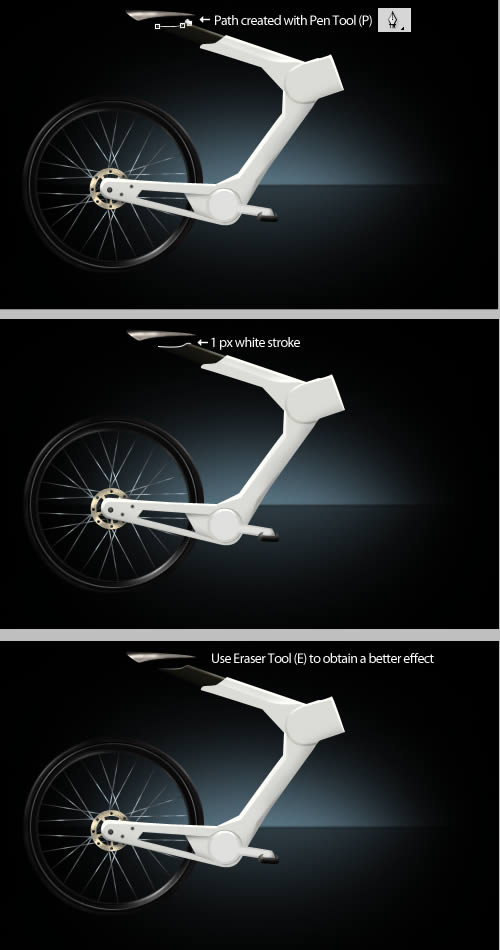
Step 17: Bike Horns
Create a path using Pen Tool (P) then fill it with a dark grey color #0f0f0d. Now playing with lights and shadows you should obtain something like in the image below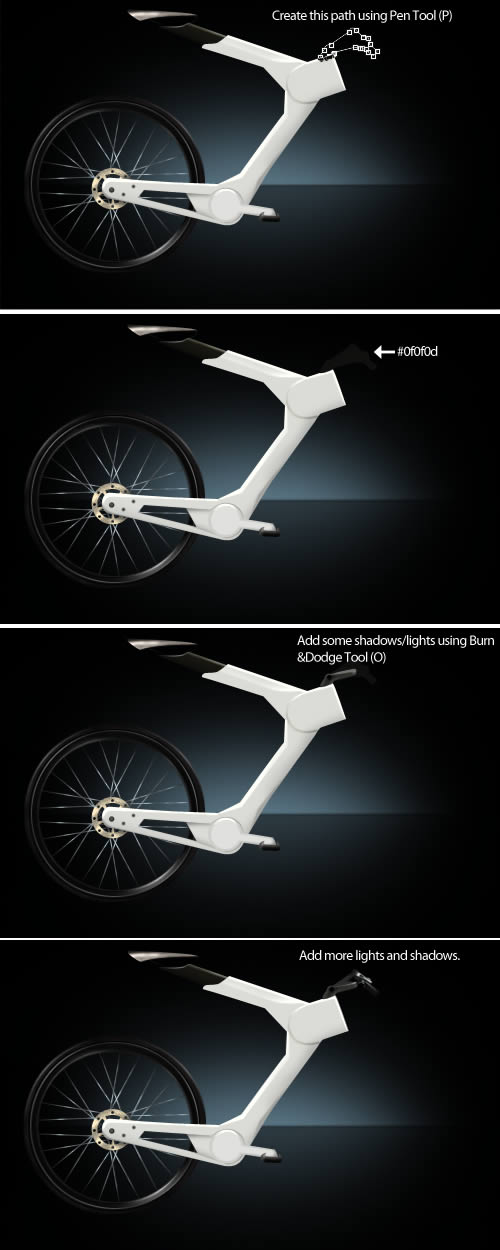
Step 19
Use Pen Tool (P) and stroke path technique add some light reflections on our bike horns.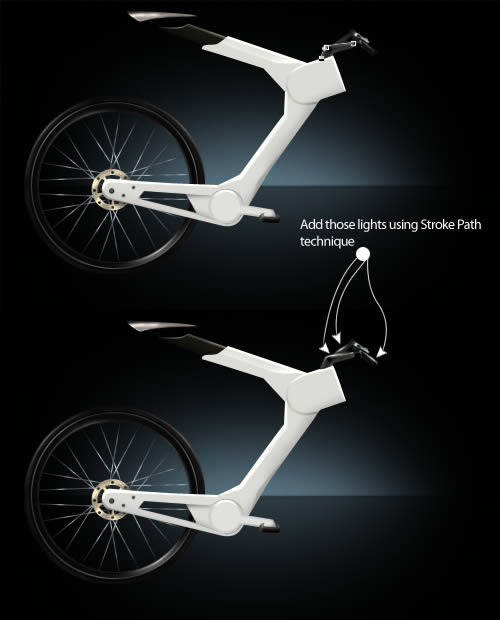
Step 20: Fork
Create this path using Pen Tool (P) and fill it with a dark brown color, I used #201f1a.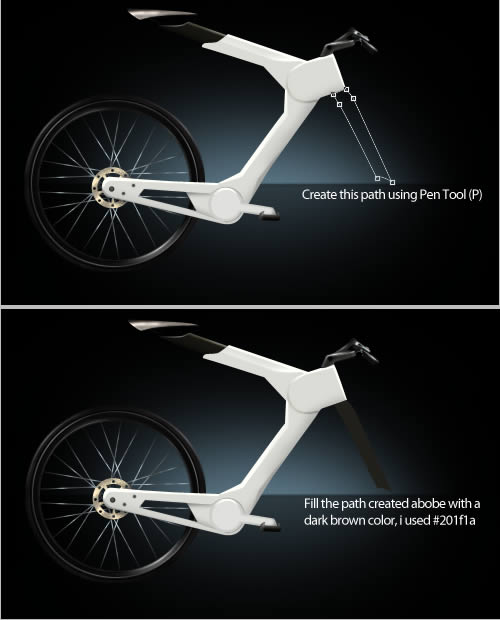
Step 21: Effects on the fork
Again, add some noise and use dodge/burn tool to obtain a better effect.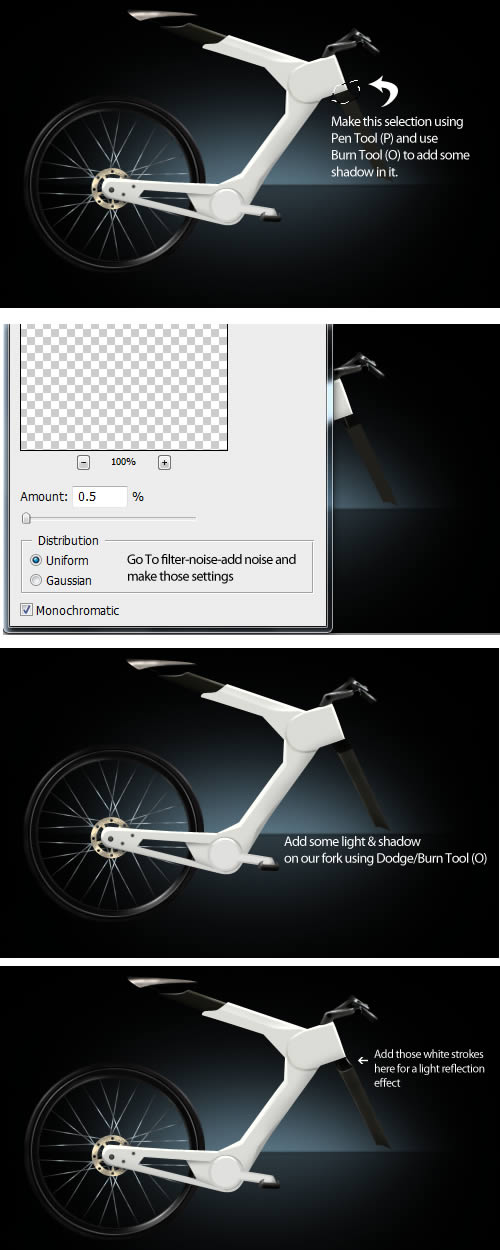
Step 22: Front wheel
Duplicate the rear wheel layers group and place it under the fork. After that I created some pieces that will support the wheel.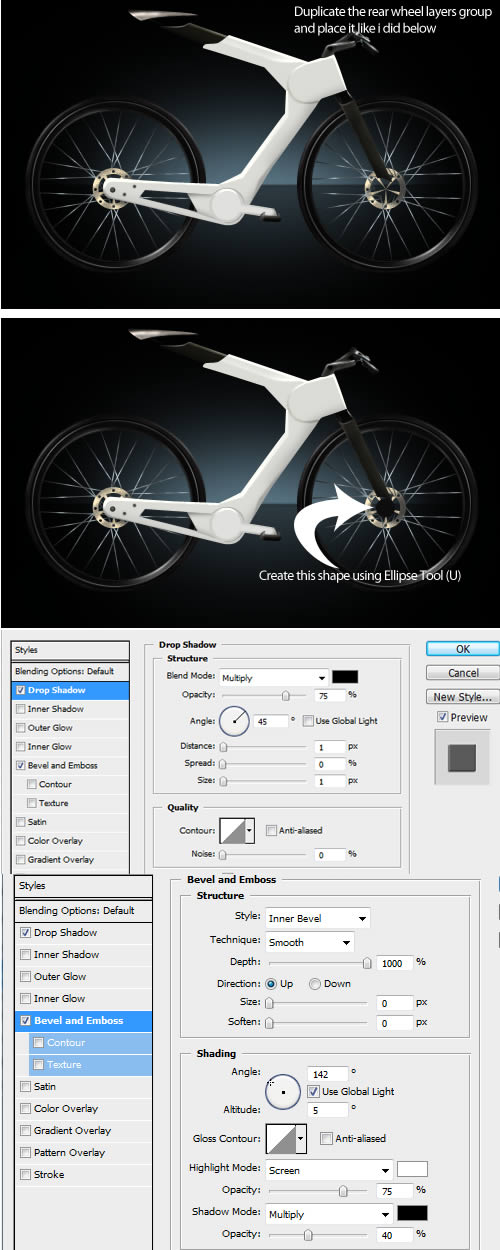
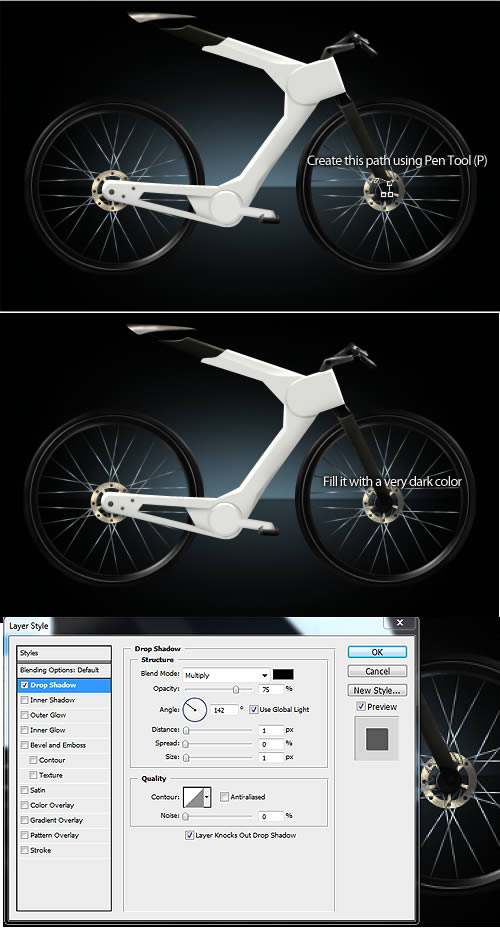
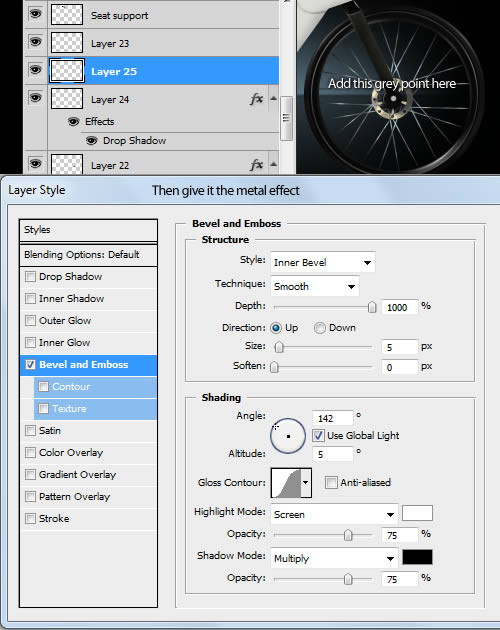
Step 23: Caliper
We are going to create the caliper! Create a path using Pen Tool (P) then fill it with a red color, add some shadows and lights using Dodge & Burn Tool (O) and your bike it’s ready go.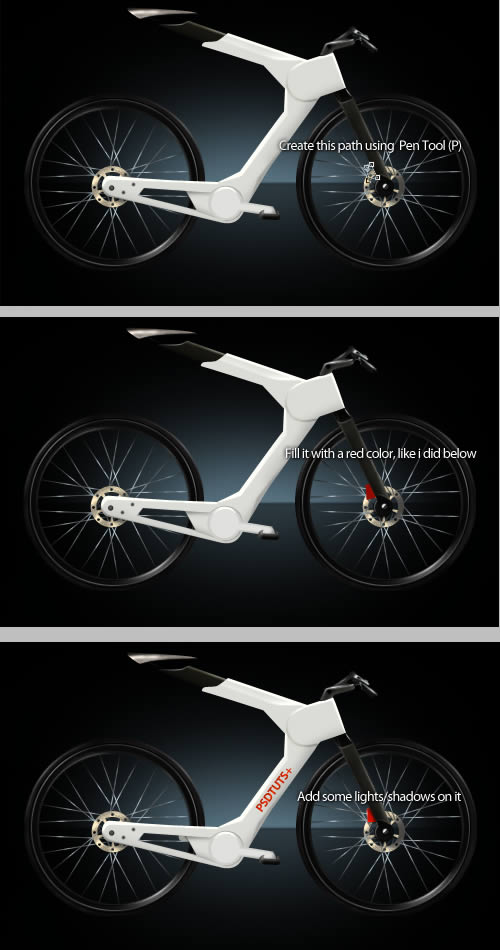
Step 24: More Details
You can add more details on the bike like stickers and other things. You can also create a reflection of the bike like I did in the next image.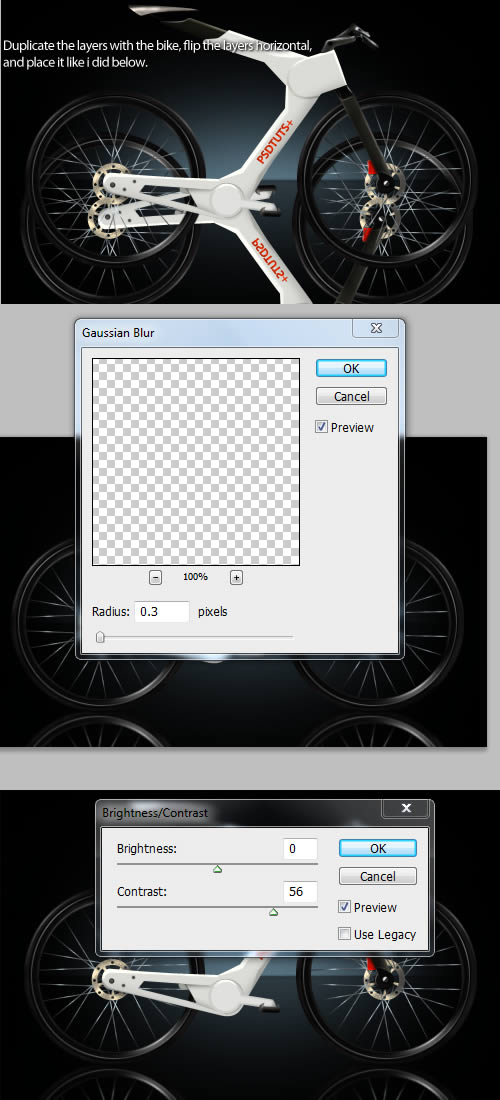
Final Image

source: photoshoplady blog


0 Comments::
Post a Comment