In this tutorial, I'll show you how to create a post apocalyptic manipulation using adjustment layers, vector masks, and some special effects. Let's get started!
Final Image Preview
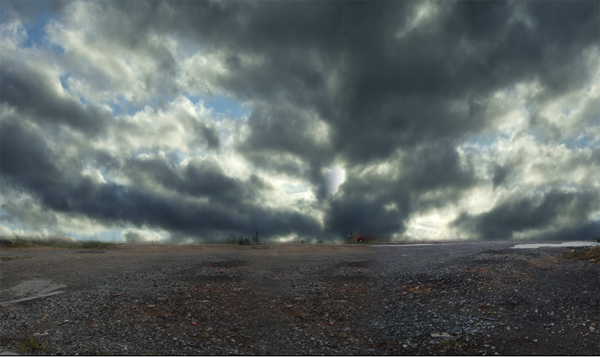
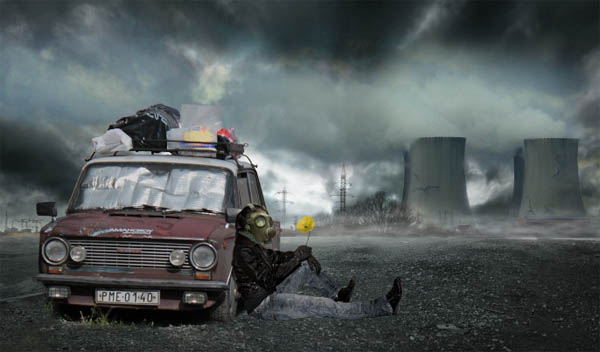
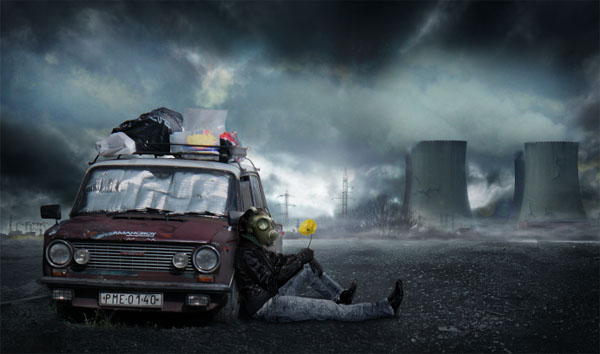
Take a look at the image we'll be creating. Want access to the full PSD files and downloadable copies of every tutorial, including this one? Join Psd Plus for just $9/month. You can view the final image preview below or a larger version here.
Preparation
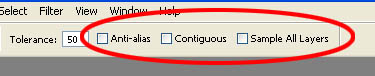
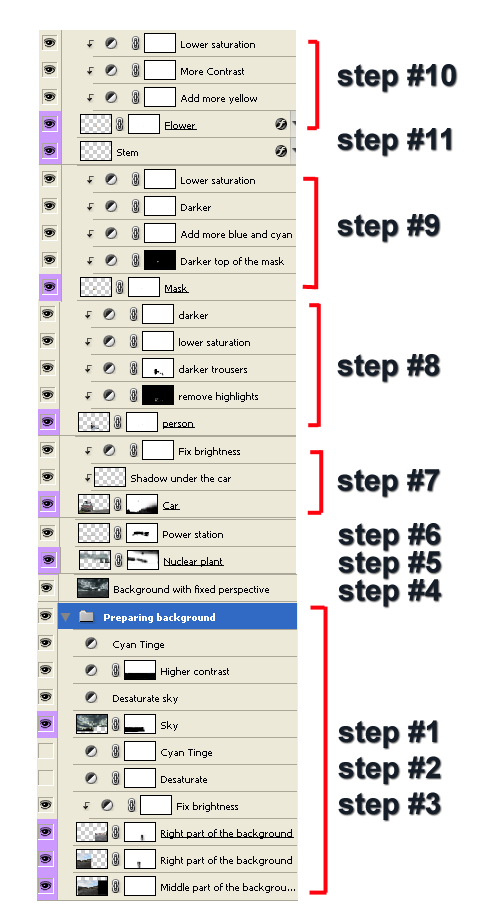
In this tutorial, we'll create the final image using mostly pictures I took. Many of which are shown below. They are available to Psd Plus members. None Plus members will need to search for compatible images to follow this tutorial. I also used an image of a gas mask, some crack brushes, curvy brushes, mist brushes and a grunge texture. You will also need an image of a person sitting down for Step 8.Step 1 - Blending the Background
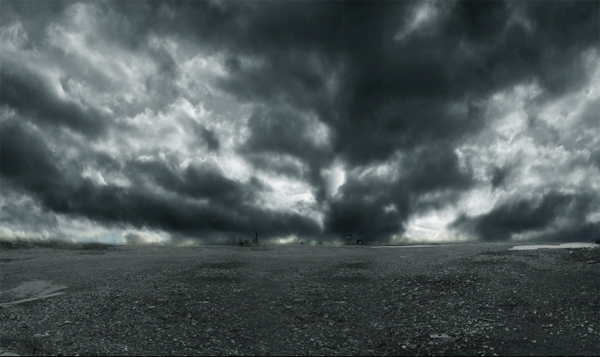
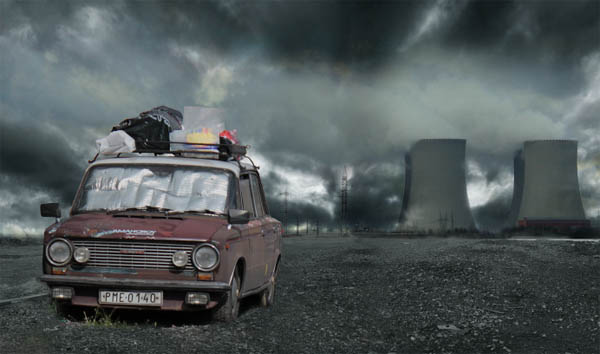
Create a new document. Open the pictures with the bottom part of the background and drag them into the new document. As you can see, I used the right picture twice to make the manipulation wider.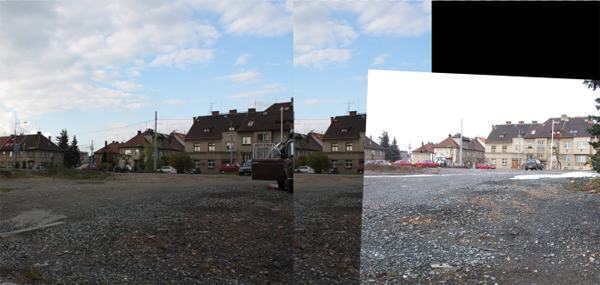
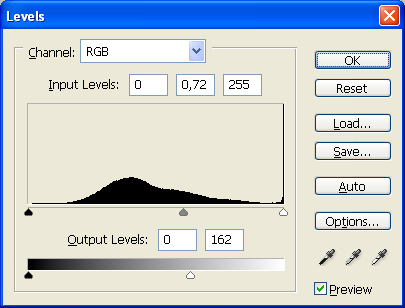
Using a vector mask instead of the eraser tool (which is so popular among Photoshop users) is better because you can very simple reverse all steps you did. You just choose white for the color and paint over the areas which you want to see again. With the eraser tool there is no way to recover. The right part of the background is very bright. Fix it by adding an adjustment layer with Levels and set it as shown.

Step 2 - Blending the Sky
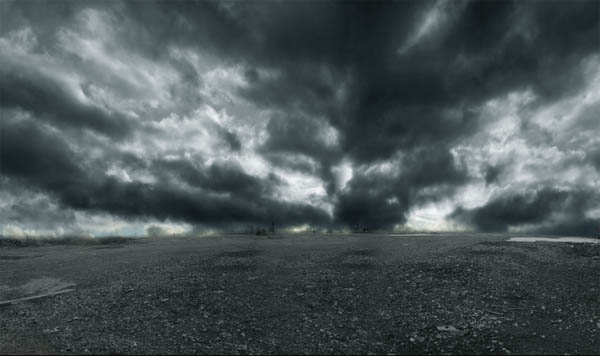
It's time to add sky. Open the proper sky photos and drag them into the manipulation. Blend them in the same way as you did with the bottom part, by adding in a vector mask to each layer, then with a black brush paint over the parts which should be hidden.Be very careful with blending because if you don't do it accurately the whole manipulation will never look realistic.
Step 3 - Coloring The Background
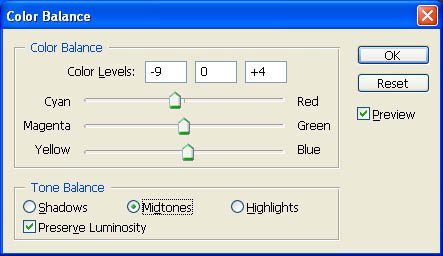
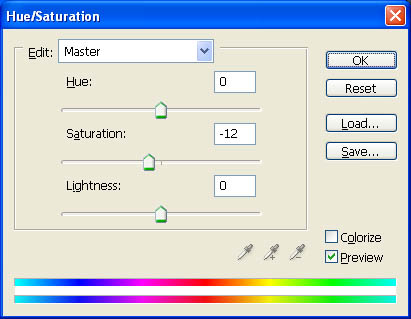
In this step, we'll desaturate the picture and add a decent cyan tinge. Click on the top of the layers and add an adjustment layer Hue/Saturation. Lower the Opacity to -100. Then add an adjustment layer of Color Balance and set it as shown.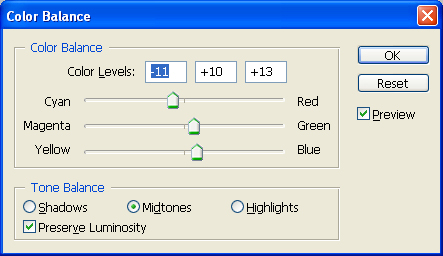

Step 4 - Fixing Perspective
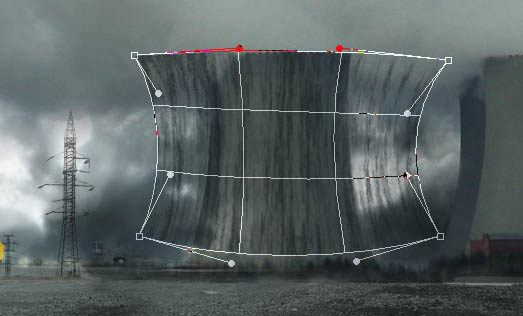
In this step, we'll fix the perspective of the manipulation. Grab the Marque Tool (M) and select the whole manipulation. Now go to Edit > Copy Merged (Command + Shift + C). Paste (Command + V) the merged image.Click on this newly created layer and add apply Filter > Distort > Spherize...set the value Amount to 20%, then press OK.
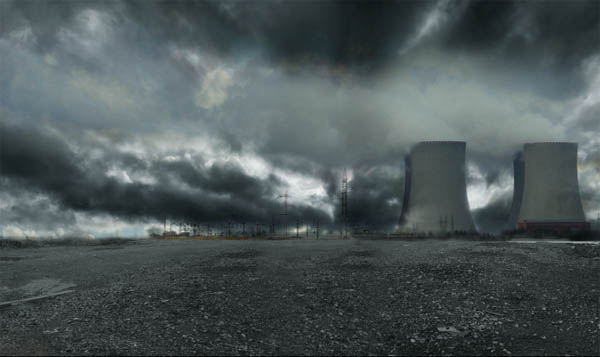
Step 5 - Adding Nuclear Power Station
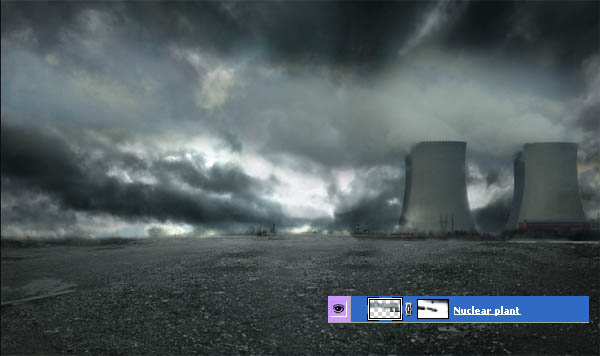
Open the picture of the nuclear station, then select the station area out of it using your preferred method. You don't have to care about the smoke much, but be very careful with selecting the cooling towers. After you're satisfied with selecting, grab the Move Tool (V) and drag the station into the manipulation.Add the vector mask to the layer with the station, then using a soft brush paint over the areas you want to have hidden. You can change the opacity and size of the brush as often as you need, as the result will look more realistic.
Just a little notice: it is better to use a lower opacity and paint over the layer more often. Thanks to it, there will be no hard edges and blending will look very realistic.
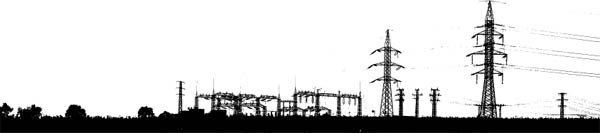
Step 6 - Adding the Power Station
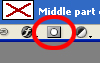
Now we're going to add the power station. It would be hell to select all the parts with the Lasso Tool or something similar to that. Instead I will show you a little trick.Open the picture of the plant. Duplicate the layer. Now go to Image > Adjustments > Threshold. Set the Threshold Level to value 162. After this you should have something similar to the image below.
Since the plant is in the background, it should be little lighter. To do that I lowered the opacity a little. You can do the same or increase the brightness, or something else you usually use.
There are some unwanted wires toward the right part of the picture. Grab the Eraser Tool (E) and simply erase them.
Step 7 - Adding the Car
Open the image of the car and separate it from the background. You can use any method you are comfortable with. I usually use the Lasso Tool, but there is no rule. After you're done, drag the car into the manipulation. If you look carefully at the bottom part of the car, there is some mess to clean up.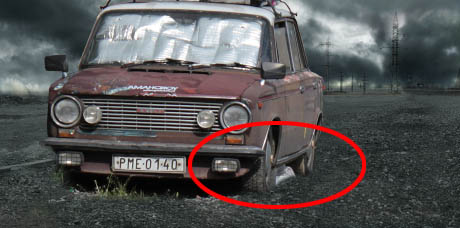
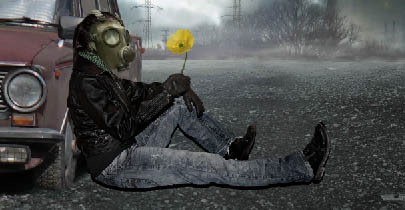
Step 8 - Adding a Person
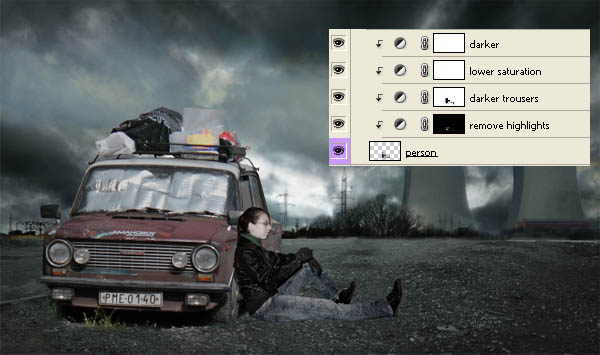
Search for a picture with a sitting person to use. I used one I had on file. Then separate it from the background and drag it into the manipulation. You don't have the similar picture as I did so you may have to do some minor edits a little different than I will show you, but the overall process should be similar.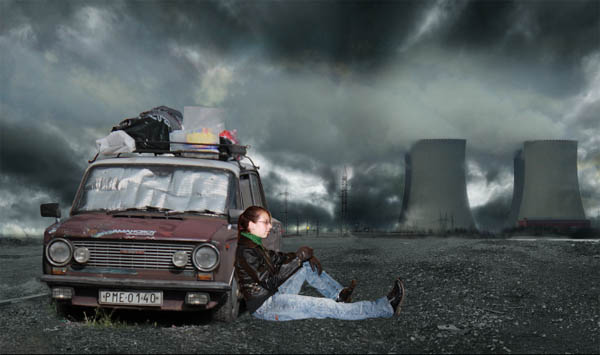
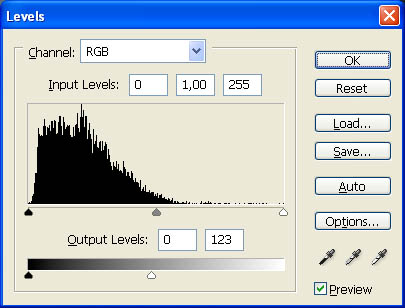
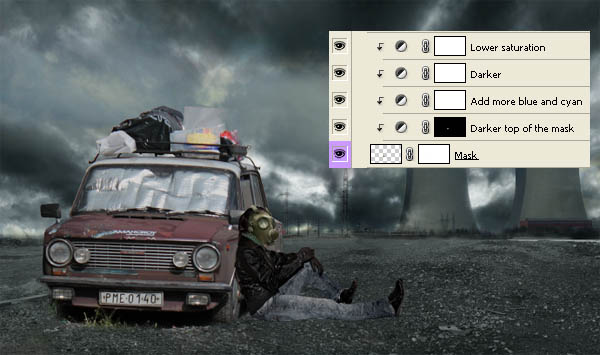
There is too much highlights and contrast is also high because the photo was taken with internal light. This type of light is very hard and does not fit the global lighting of this manipulation. Add a new adjustment layer of Levels and set it as shown.
The whole picture of person should be darker. Add a layer mask of Brightness/Contrast and set the Brightness to -25 and Contrast to -15.
Step 9 - Gas Mask
Download the photo of a gas mask here. Separate it carefully from the background and drag it into the manipulation. Go to Edit > Transform > Warp and change the grid to fit better on the face. The result should look similar to the image below.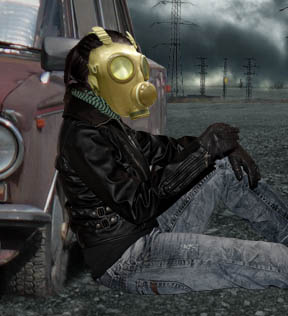
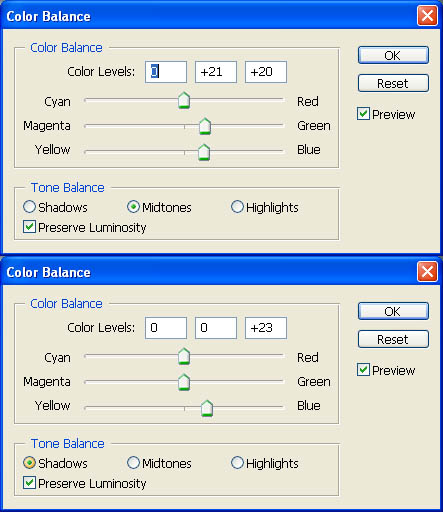
Now we are going to add more cyan colors. Add an adjustment layer of Color Balance and set similar to that shown below.
Step 10 - Adding the Flower
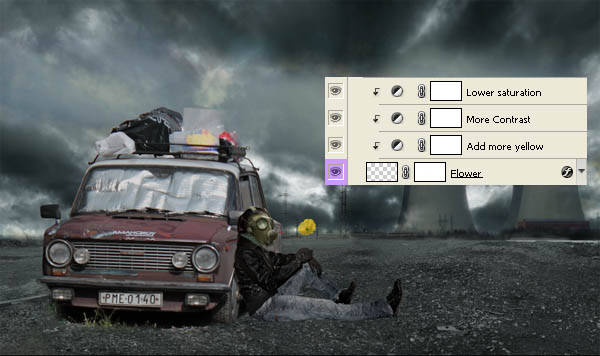
Open the picture of the flower. Separate it from the background and drag it into the manipulation. As you can see, the flower doesn't have a nice yellow color like the final image. To improve that add adjustment the layer Color Balance and set it as shown.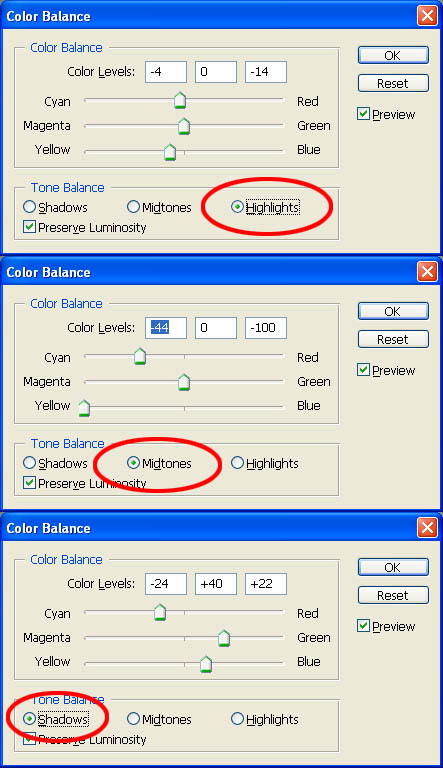
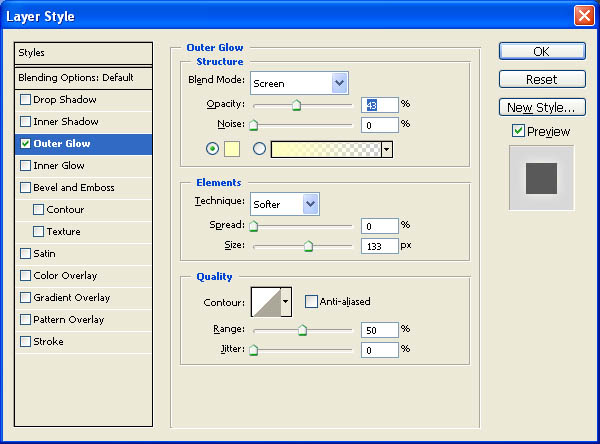
According to me, it would be nice to separate the flower from the background a little more by adding an outer glow. Right-click on the layer with the flower and choose Blending Options. Now check Outer Glow and set it as shown.
Step 11 - Painting the Steam
Don't worry, you won't have to paint anything difficult here, just one nice curve. If you have some big problem with doing that you can download some curvy brushes (for example here and use them). This is just a quick step. The results should look like the image shown below.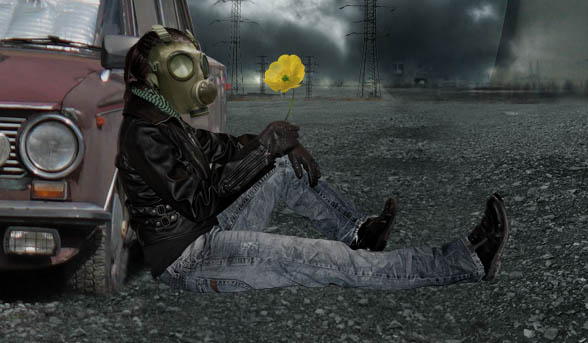
Step 12 - Adding Global Lighting
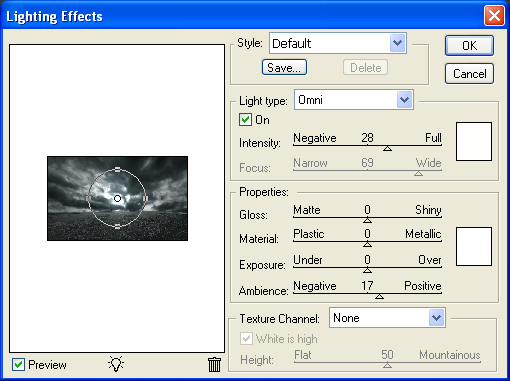
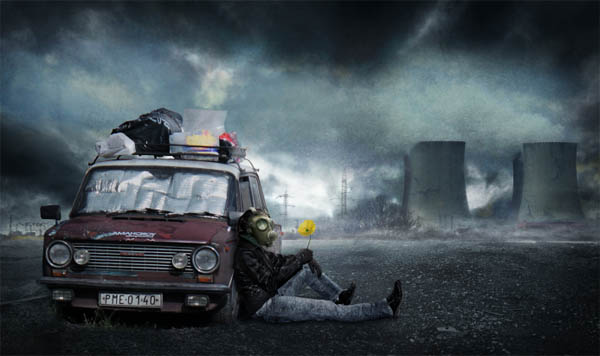
In this step, we are going to change the global lighting to create a more dramatic atmosphere and catch the viewer's attention.Click on the layer with the background and fixed perspective. Duplicate the layer. Now go to Filter > Render > Lighting Effects, and set it as shown.
Step 13 - Destroying The Nuclear Station
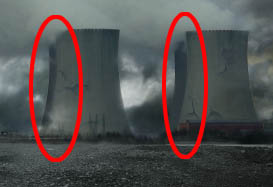
According to me the nuclear station should be a little more destroyed and dirtier. At first we will fix the cleanness issue.Install the dirt brush. If you don't know how, you can look at this tutorial. Create a new layer and paint dirt over one of the towers. Now go to Edit > Transform > Warp, and adapt the dirt to the shape of the tower.
Step 14 - Fix the Lighting On The Nuclear Station
Since we added quite strong light in the middle of manipulation, we have to fix the lighting on the station.Add an adjustment layer of Levels above the layers with the nuclear station. Set the Input Levels to: 0; 1,25; and 255. Fill the vector mask with black and choose a nice soft, round brush with low opacity. Now paint over the areas which should be lighter. If you are not sure, look at the picture below for reference.
Step 15 - Adding the Mist
In this step, we'll add a pretty mist to the background. Download some mist brushes (I used these) and install them. Now add a new layer above the layers which are in the background (the layers with power and nuclear station, not the layers with car and person). Grab the Brush Tool (B), choose a white color, lower the opacity of brush, then paint the mist.If mist does not look natural, then try lowering the opacity more, or change the blending mode to Screen.
Step 16 - Adding the Lens Flare
As you can see in the previous picture, light on the horizon isn't still the same as in the final image. We will fix it with adding a lens flare.Create a new layer above the layer with the mist. Fill it with a solid black color. Go to Filter > Render > Lens Flare, then choose the type of flare you wish. I used Lens Type 105 mm Prime. Press OK. Now change the blending mode of the layer to Screen, or Lighten, and then lower the Opacity to about 40%.
Step 17 - Shadows Under the Person
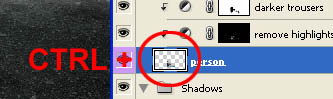
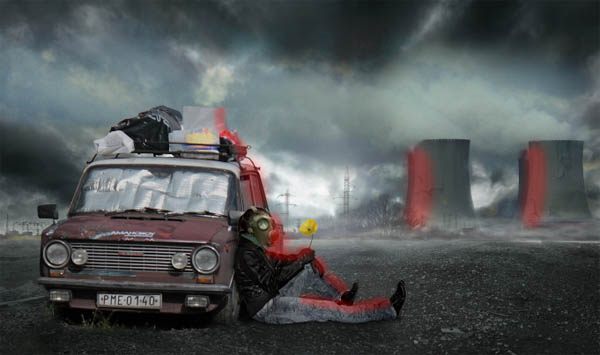
In this step, we will add shadows under the person and on the front of the car. Remember that shadows are very important and if you look carefully around you, you'll realize that everything has some shadows. Keep this in mind when creating any of your manipulations!Create a new layer under the layer with the person. Now Command-click on the thumbnail of the layer with the person. It activates the mask of the person.
Now do the same procedure as before, but lower the Opacity even more to about 40%. Very well, the shadows under the leg are done! Now we have to add shadows under the person's back. The process is still same, except you move the shadows to the left and not down. After this step, your manipulation should look similar to the image below.

Step 18 - Shadows In Front Of The Car And Person
There have to be shadows in front of the car and person because of the light source and background. We will fix it very easily though! Add a new layer under the layers with the car and person. Grab the Brush Tool (B), then choose a big, soft, round brush. Pick a black color and lower the Opacity to about 30%. Now just pain in front of the car and person. Easy isn't it?Step 19 - Adding the Highlights
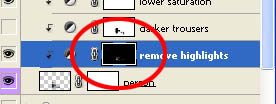
In this step we will add some highlights to increase the contrast and make the whole scene a little more dramatic.Add an adjustment layer of Levels on the top of all your layers. Set the Input Levels to these values: 0; 2,30; and 208. Press OK. Now fill the vector mask of the adjustment layer with a solid black color. Grab the Brush Tool (B), choose a white color and lower the Opacity to 25%. Paint over the areas which should be highlighted. If you're not sure, then look at the image below for reference.
Step 20 - Shadows Once Again
Now we'll add some more shadows. Add an adjustment layer of Levels again and set the Input Levels to: 17; 0,60; and 255. Fill the vector mask with black and with a white brush paint over the areas where you think there should be more shadows.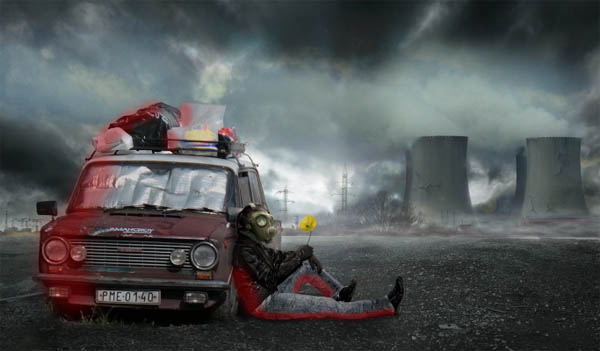
Step 21 - Final Adjustments
During this and next step we will create the atmosphere which you can see in the final image. Add an adjustment layer of Color Balance on the top of your layers, then set the Color Levels as: -3; +4; and +15.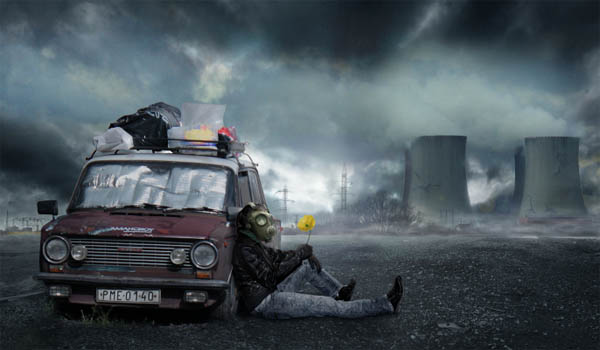
Conclusion
Well, that's all. I hope that this tutorial was useful for you and you've learned some new techniques, or you've found inspiration for your own photo manipulations!


0 Comments::
Post a Comment