In this tutorial, we will explain how to create vector skyscrapers and how to set up a vector city with simple steps. This is a beginner tutorial and easy to follow. Let's get started!
Final Image Preview
Below is the final image we will be working towards.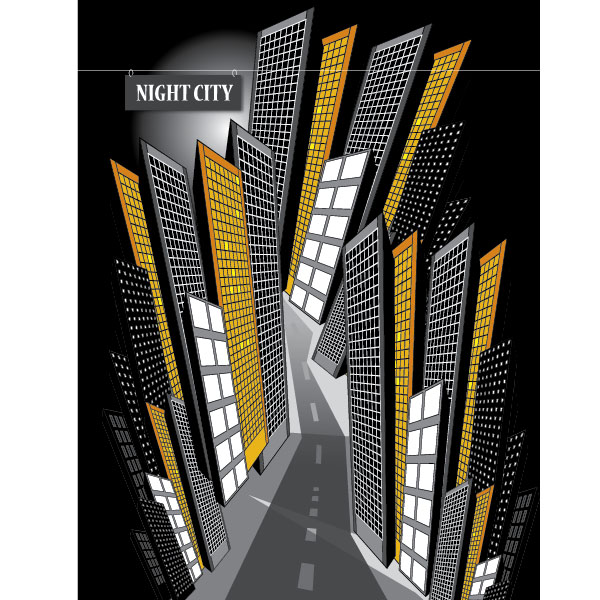
Tutorial Details
- Program: Adobe Illustrator
- Version: CS4
- Difficulty: Beginner
- Estimated Completion Time: 1 hour
Step 1
Open a new document and select the Rectangular Tool Grid in the Tool Bar.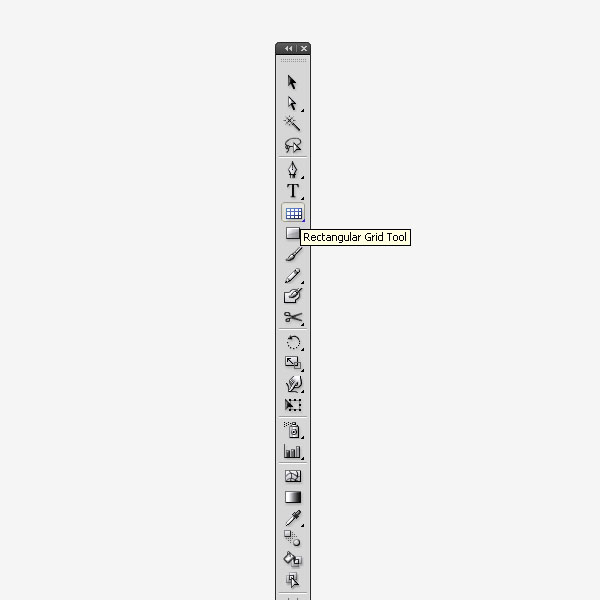
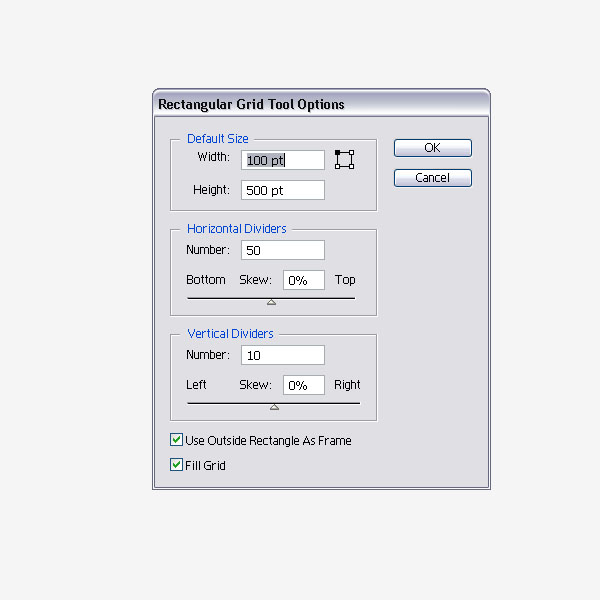
Step 2
First set the fill to black and the stroke to white. Then click once on the artboard and the Rectangular Grid Option window will pop-up. Apply the settings you see in the image below.I chose an easy to divide size (100 x 500), so the grid we are setting-up will give us square fields. Choose 50 for Horizontal Dividers and 10 for Vertical Dividers. Check Use Outside Rectangle As Frame and Fill Grid, then click OK.
Step 3
This is what the rectangle should look like.
Step 4
Select the just created shape and open the Pathfinder Palette. Click the Divide option.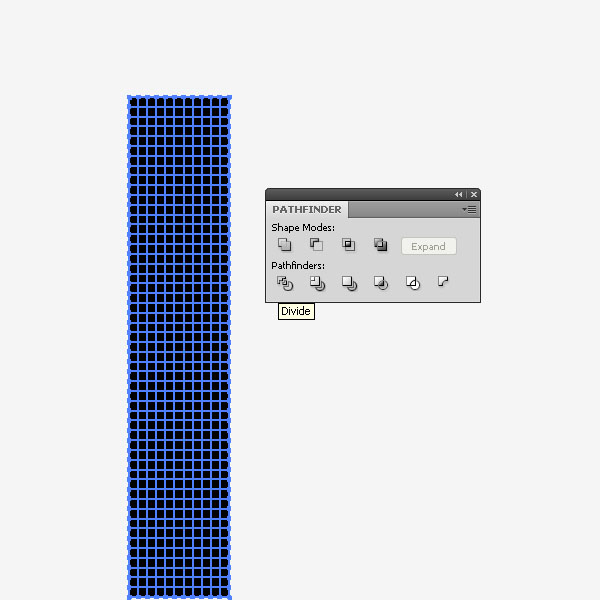
Step 5
Now we have squares with a white border and a black fill.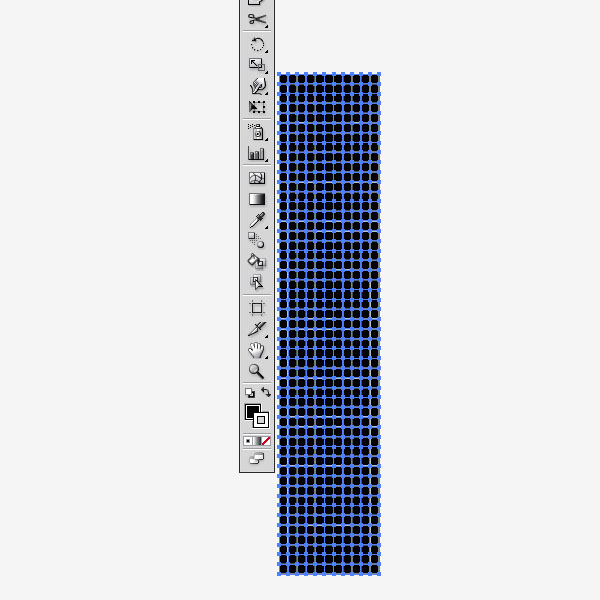
Step 6
Zoom in and grab the Direct Selection Tool (A). Click in one of the squares. You can see that each square has a white stroke and the black fill. If you want to add some windows, you can just change the fill to another color to give the illusion of a window.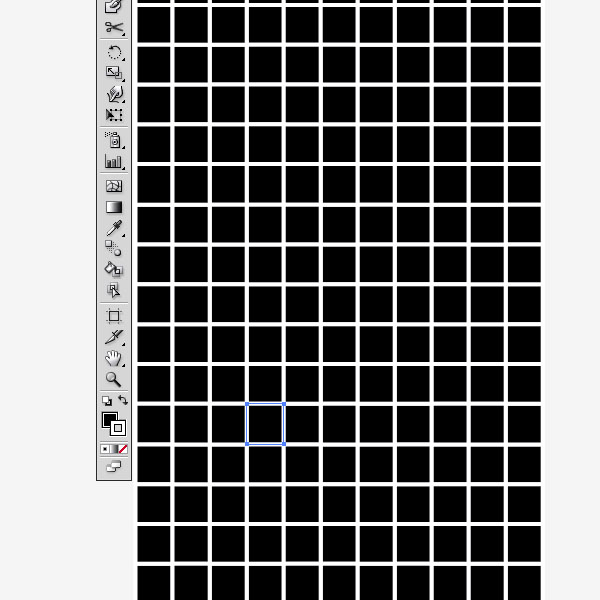
Step 7
Use the Rectangle Tool (M) to crete several shapes around the grid shape to make it look like a front view of a skyscraper. Fill them with a different color and stroke.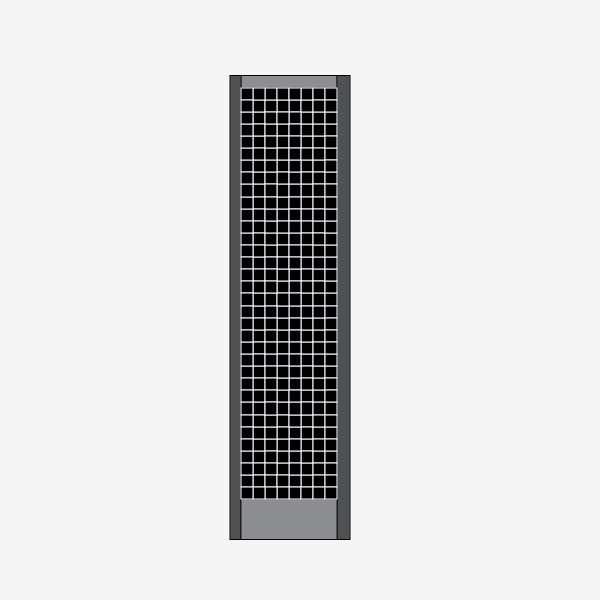
Step 8
Repeat Steps 1 - 7 and choose different colors. In the example below, I chose yellow and changed some of the squares to a lighter yellow representing windows.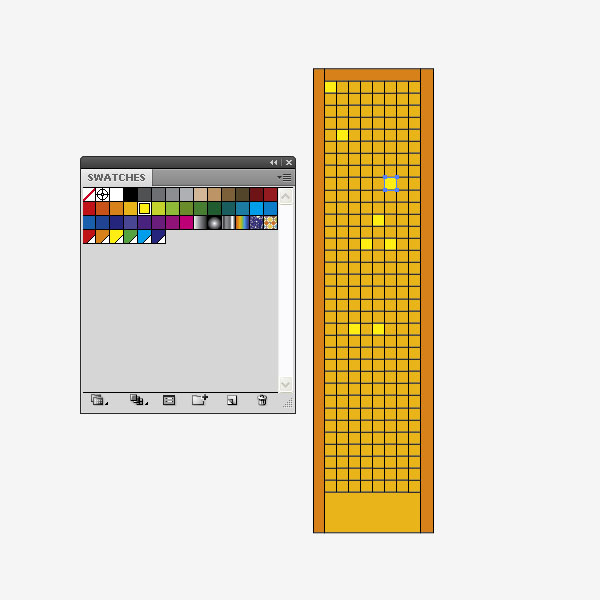
Step 9
Let's create another skyscraper with another easy trick. Create a rectangle and fill it with black.
Step 10
Create a small white square and duplicate it.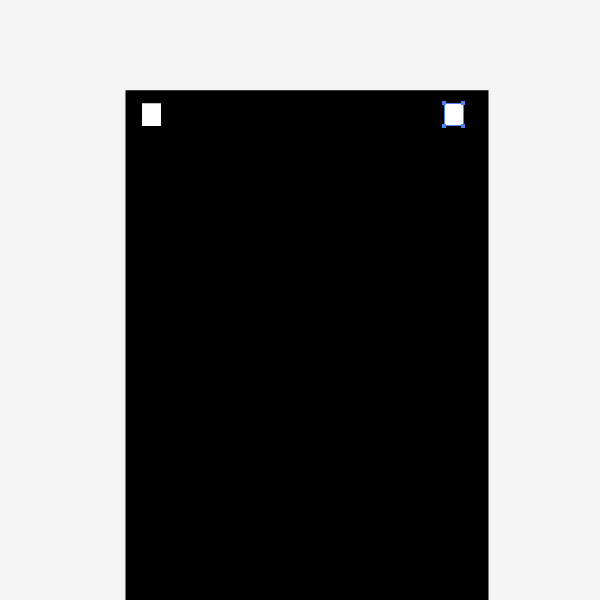
Step 11
Select both squares and open the Blend Options via Object > Blend > Blend Options. Choose Specified Steps: 6 and click "OK."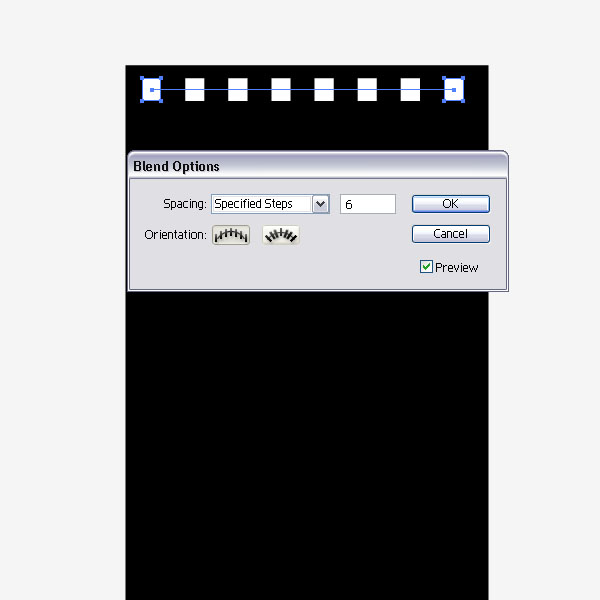
Step 12
Expand the blend (Object > Blend > Expand) and duplicate the row of squares. Repeat the Blend Options of Specified Steps.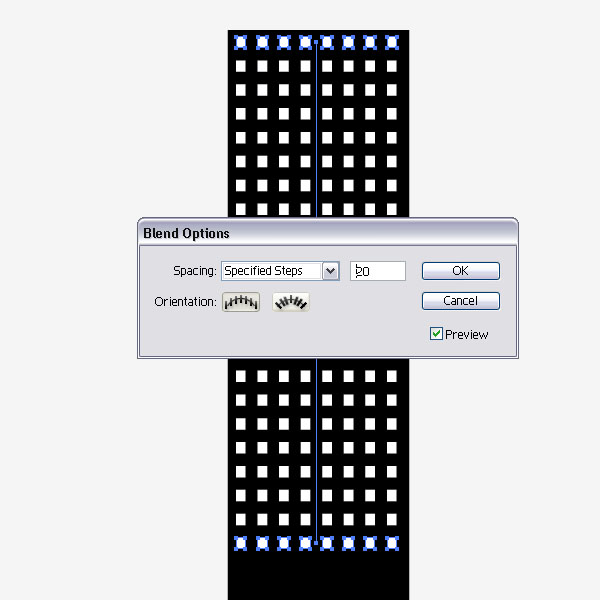
Step 13
Expand the blend again. Now we created another skyscraper shape.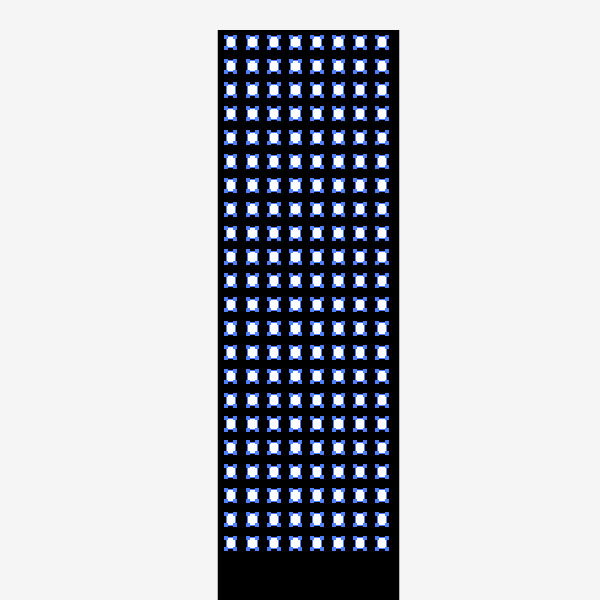
Step 14
Below you can see examples of the front views of the skyscrapers I created. Drag all of these shapes into the Symbol Palette. We will need them in the following step.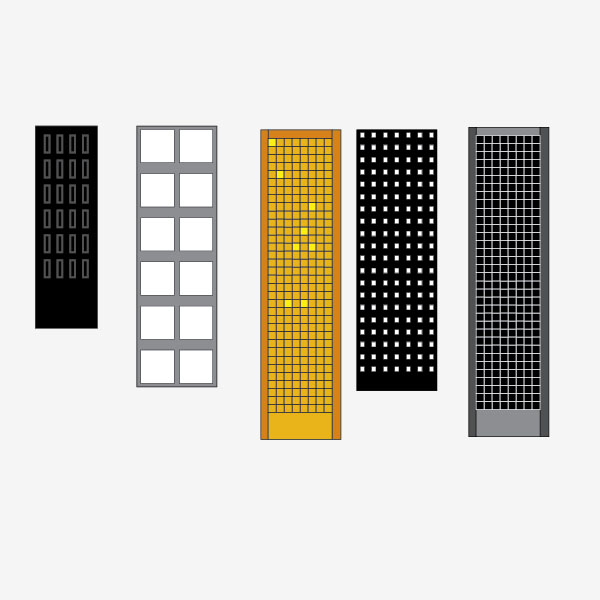
Step 15
Create a rectangle that is about the same size as the skyscrapers. Now open the 3D Extrude & Bevel Options. Apply the settings of the image below.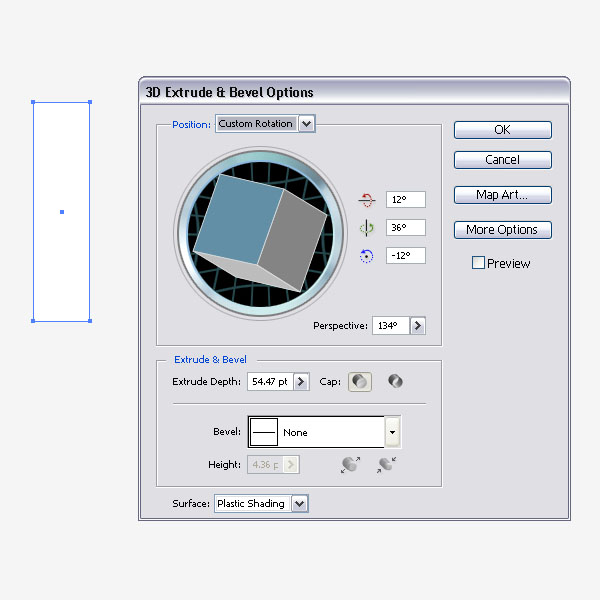
Step 16
Keep the 3D Extrude & Bevel Options open and click on the Map Art button. Since we dragged each skyscraper shape into the Symbols Palette, we can now chose one and apply it to the rectangle. You can find it under the Symbol tap on the left. Since we have a simple shape, we will apply it to the first surface. Click "OK."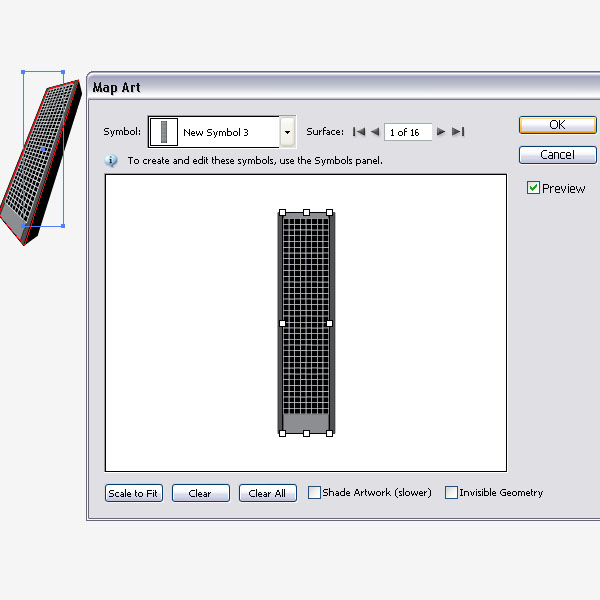
Step 17
Select the new 3D shape and apply a Drop Shadow. This is optional.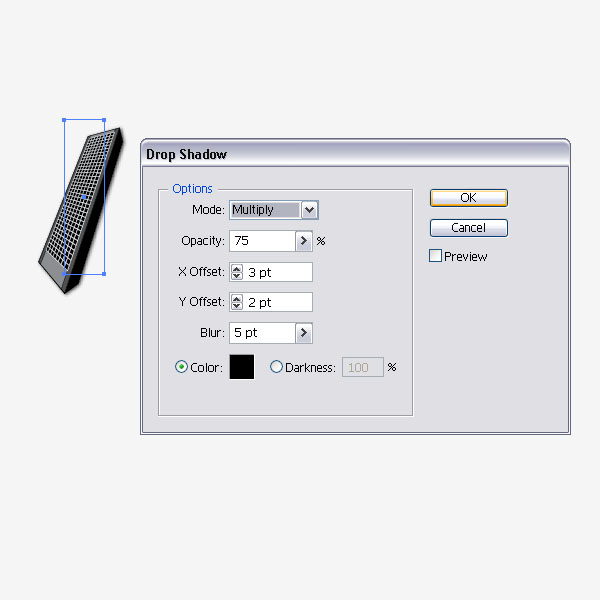
Step 18
Repeat Step 15 to 16 and create several more skyscrapers.
Step 19
Keep adding more of the shapes.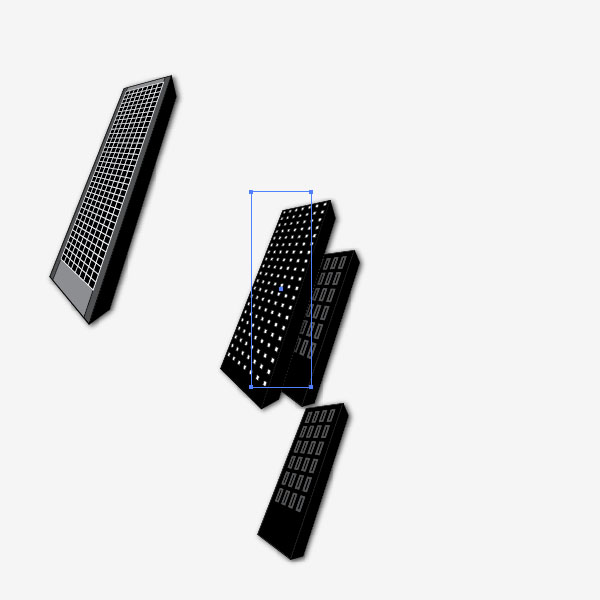
Step 20
Layer them in front and in the back so it looks more like a tilted city.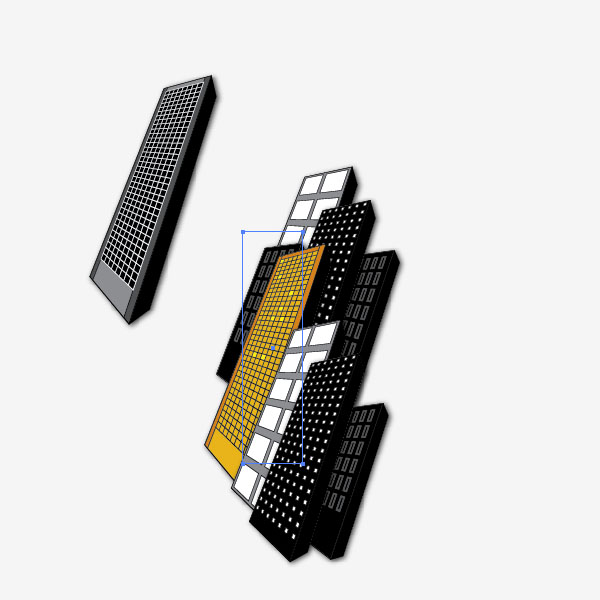
Step 21
This is what you should have after several added and layered skyscrapers.
Step 22
Create a big rectangle and fill it with a radial black to white gradient. Place the highlight towards the top.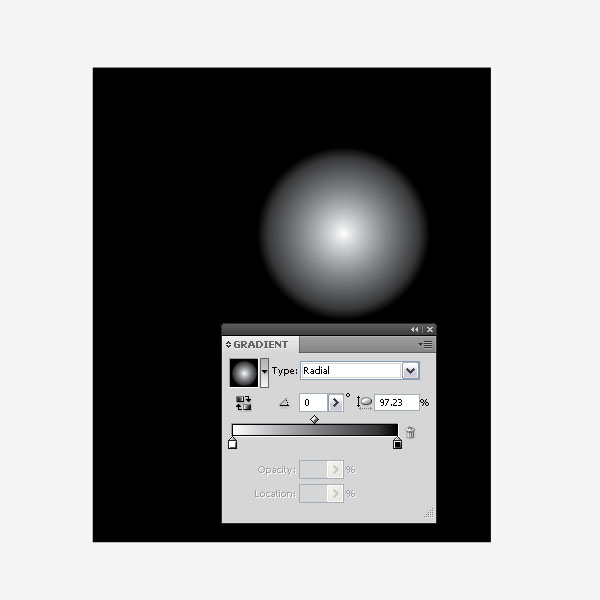
Step 23
Select all of the skyscraper shapes and group them (Command + G). Place them on top of the just created background shape. For my liking they look a little odd. Let's give then a more surreal look.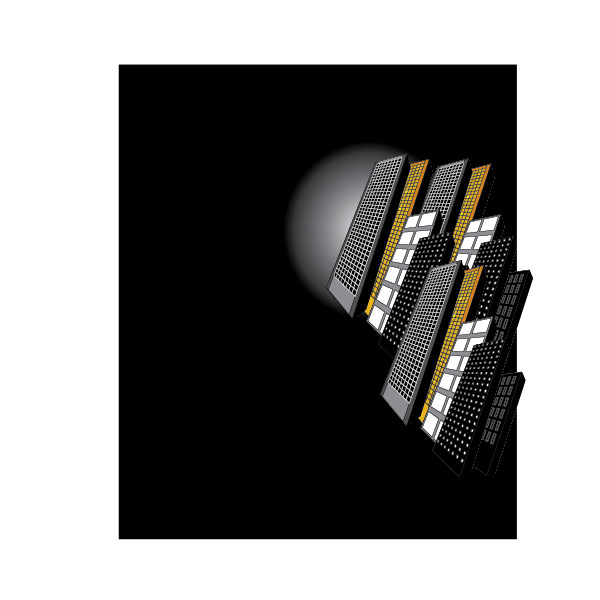
Step 24
Select the skyscrapers and expand their appearance. ( Object > Expand Appearance).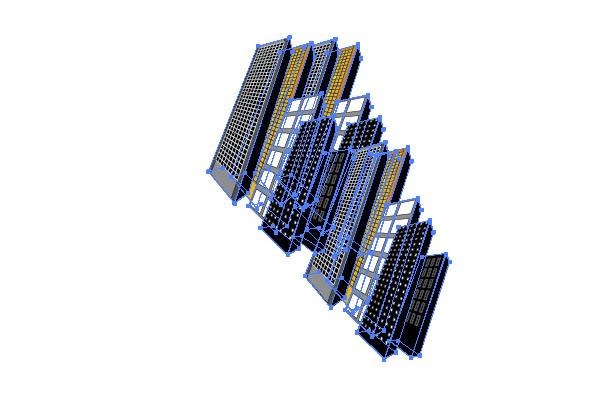
Step 25
Then reflect them and duplicate them.Step 26
Select the shapes and transform them by selecting E.Step 27
Then click with the mouse on the right-bottom corner and press Command + Shift + Control and start dragging towards the left. This will skew the shapes.Step 28
This is what it should like with the transform effect applied.
Step 29
Place the transformed skyscrapers onto the background.Step 30
Repeat the transform effect with the other shapes.Step 31
Now duplicate the skyscrapers and built up a small city street by placing them onto the background shape.Conclusion
I created a few street shapes with the Pen Tool (P), a sign hanging from the top and a thin wire running across. Nothing special, nor complicated, but just a few more fun elements. I hope you enjoyed this beginner tutorial and successfully made your own vector city!


0 Comments::
Post a Comment