In this tutorial, we show you how to get the best out of Photoshop's indispensable Clipping Masks.
Introduction
Often, when creating images in Photoshop, you'll want one layer to take on the shape of another. For instance, in the example below, a photo has taken on the shape of a rounded rectangle: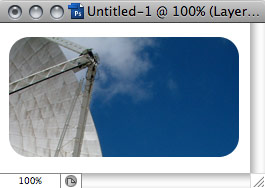
The ideal way of doing this is to not do any destructive edits at all, and we can achieve this easily by using a Clipping Mask. At its most basic, a Clipping Mask consists of two layers:
- A base layer, which provides the shape (in this case, the rounded rectangle)
- A second "clipped" layer, which provides the "content" (the photo)
Creating a Clipping Mask
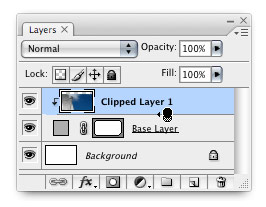
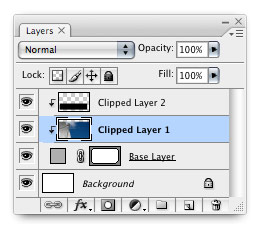
To create a Clipping Mask, first make sure the base layer is directly under the layer that you want to be clipped in the Layers palette. Hold down Alt/Option and click the line between the two layers in the Layers palette. The cursor changes to a left pointing arrow and tow interconnecting circles, like a little Venn diagram. Click the mouse.Immediately, you'll see the photo layer "clip" to the base layer. To denote this, you'll see a right-angled downward pointing arrow next to the clipped layer, as below.
The benefits of using a Clipping mask
There are two main benefits to using a Clipping Mask rather than a destructive edit. The first is that you can recompose the layers within the Clipping Mask, which still have all their image data, even outside the visible area defined by the mask. That means that you can select the clipped layer you want to recompose and using the Move tool, drag the image around within the mask until you have it right. That's a massive time-saver over the destructive approach, and will make you more willing to experiment since it's so easy.Secondly, you can reshape the base layer on the fly, and see the changes reflected in the Clipping Mask. For instance, you could use the shape editing tools to edit a shape layer while it was still forming the mask, getting instant visual feedback on the results.
What kinds of layers can I use as the base layer for a Clipping mask?
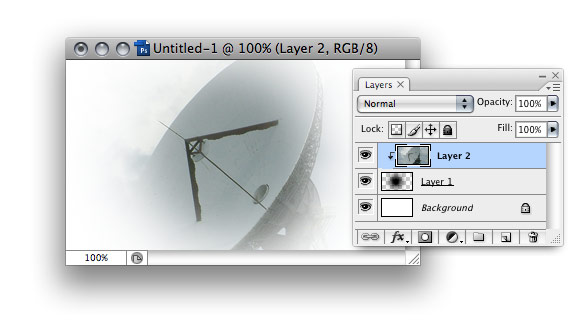
Pretty much any type of layer can be used as a the base layer for a Clipping mask, including Type layers, vector shape layers and normal bitmap layers. Lets have a look at some examples of these in action. First, a Type layer: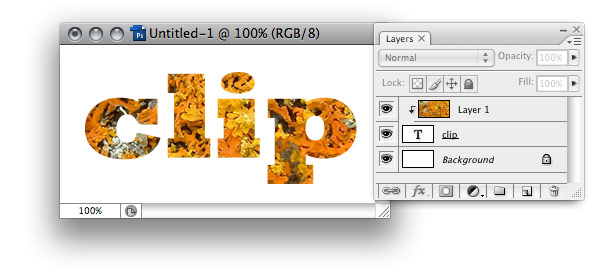
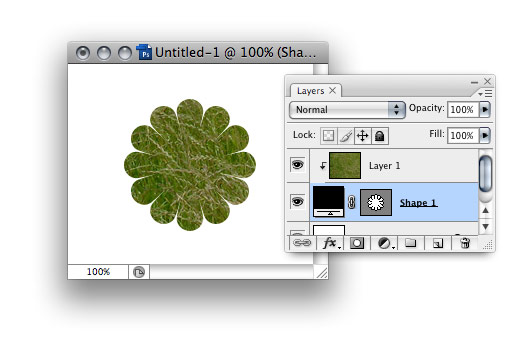
We've seen a vector shape layer in action already, but the example below shows a detailed Custom shape layer forming the base layer of the Clipping Mask:
Opacity & Blending Modes
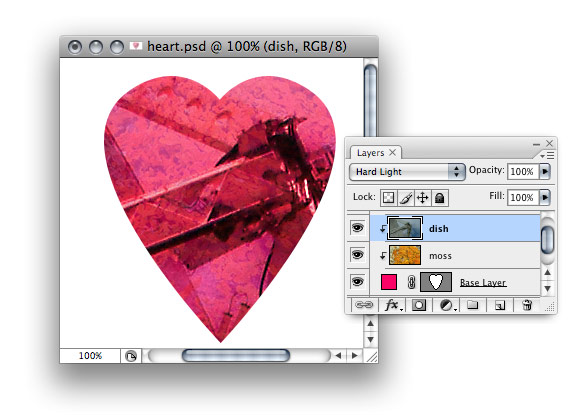
You can adjust the opacity of the base layer of the Clipping Mask to change the opacity of all the layers above it. In other words, the clipped layers don't just take on the shape of the base layer, but also the opacity settings. This also applies to the Blending Mode of the base layer. For instance, if you apply a Blending Mode of Soft Light to the baselayer, it will affect all the clipped layers too.It gets better. You can also adjust the opacity and Blending Modes of all the clipped layers individually, which is a great way of creating lush, detailed images. In the example below, the base layer is a pink heart shape. The moss layer provides texture, and is set to a low 28% opacity. The machinery (the centre of the earlier satellite dish) is set to Hard Light Blending Mode, allowing it to take on the texture of the moss below.
Layer Styles
A fun trick is to apply Layer Styles to the base layer of the Clipping Mask, which allows you to add all sorts of effects to the basic Clipping Mask. To achieve this, double-click on the base layer of the Clipping Mask to bring up the Layer Styles dialogue box, and add effects as you see fit! You can see some examples below.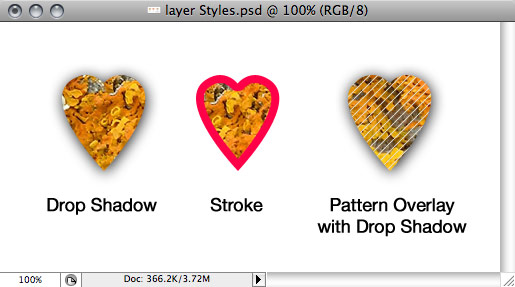
In practice
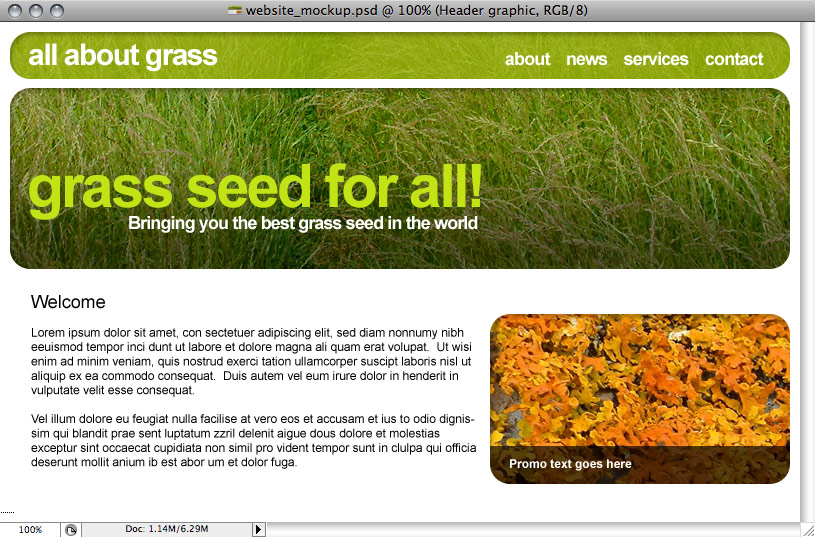
Finally, if you want to see how I use Clipping masks on a day-today basis, take a look at this imaginary website design below. It uses Clipping Masks for the menu background, the header graphic, and for the promo area on the right. I've also added an Inner Shadow Layer Style to the base layers.Download the PSD file here (2.8Mb) to see how it all works.
Finishing up
As you can see from the example above, I seriously couldn't be without Clipping Masks. They make it very easy to achieve some great effects which I can then tinker with at length without any fear that I'm making destructive edits, and they're great when a client decides that they need a different crop of an image at a moment's notice!As always, experiment and have fun!


5 Comments::
Wonderful tutorial. its really very helpful.
Clipping Creations India
Offshore Clipping Path
Arafin Media
Nice services. I am getting more interested about it.
clipping path service
Good article you have published . I appreciate your post and thanks .
Really a great addition. I have read this marvelous post. Thanks for sharing information about it. I really like that. Thanks so lot for your convene. clipping mask photoshop
It's really a wonderful and handy piece of information. I rejoice that you just shared this valuable details with us. Thanks for sharing this with us.
Visit our website: Background removal service
Post a Comment