Photoshop now has some wonderful tools for using brushes. In this tutorial we'll be showing you how to get the best from them, as well as how to make your own brushes.
The basics
Create a new document, and bring up the Brush Tool by clicking on the little brush icon in the Tools palette, or hit B on your keyboard.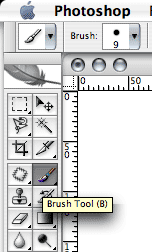
Defining your own brushes
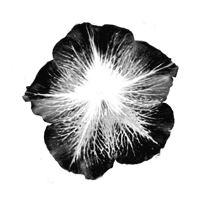
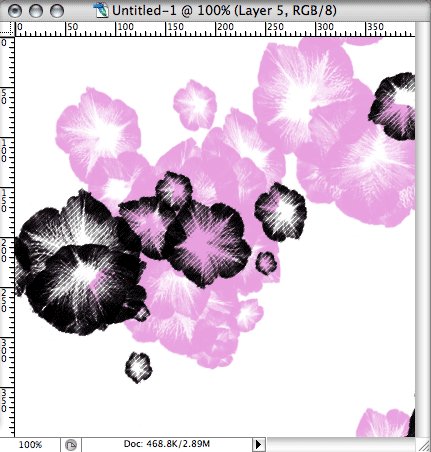
That's the basics of accessing your brushes, but what can we do with them now? One of the great features about the brushes in Photoshop is being able to create your own from virtually any shape you've drawn.Here's an example. In the grab below, I've created a flower from a photograph by selecting the colour from the petals, deleting everything else and filling the remaining image with black. You can see how to do this in our "Selecting stuff" tutorial. The flower is sitting on its own layer.
The Brushes palette
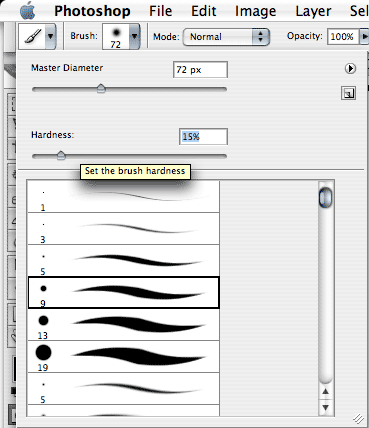
To get the best out of it though, you need to dig a little deeper for more options. If you simply paint with the default settings it really just gives you an ill-defined line or blob of your chosen shape. In CS2, though, you have a lot more control.Open the Brushes palette (Window > Brushes) and on the left you'll see an array of options to define what happens when you "draw" onto the canvas. For instance, the "Shape Dynamics" section allows you to experiment with multiple sizes and orientations of your chosen brush, all dynamically created on the fly as you draw.
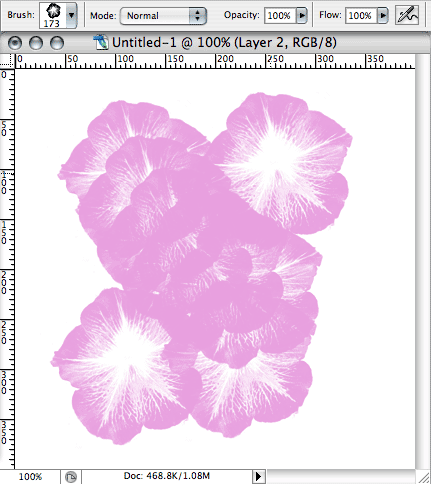
One of the most important sections is "Scattering". These controls allow you to create more diffuse patterns. Other options allow for control over opacity, colour etc. You can even add a pattern to your strokes, or use two brushes simultaneously.

The results:
Going further
Photoshop depends on its brushes for all manner of other tasks too. For instance, the Eraser tool, the Cloning tool and the History Brush all use brushes to define the size and shape of the area they cover. This means that you can combine all the settings we've covered above with many other tools, leading to some wonderful creative effects. You're really only limited by your imagination, so be sure to have a good play with these options.The brushes also work really well when combined with a graphics tablet, because they respond to the pressure information these devices provide. Photoshop illustrations really start to come alive when used with a tablet, and you can get much more organic results.


1 Comments::
Wow nice post. what is the name of this brush????
Clipping Creations India
Offshore Clipping Path
Arafin Media
Post a Comment